Needs More?
KubeVela is programmable, it can be extended easily with definition. You have the following ways to discover and extend the platform.
Learn more built-in capabilities
There're many out-of-box capabilities installed along with KubeVela controller, refer to the following links to learn more details:
- Built-in Component Reference
- Built-in Trait Reference
- Built-in Policy Reference
- Built-in Workflow Step Reference
Extend by Managing Addons
Installing addon from the community is also one of the most important way to discover more capabilities.
List Addons
KubeVela community has maintained a growing catalog of addons which will be synced to the default addon registry (https://addons.kubevela.net). You can use vela command line to list all available addons by:
vela addon list
The command will show the basic addon info along with all available versions.
NAME                            REGISTRY        DESCRIPTION                                                                                             AVAILABLE-VERSIONS              STATUS
rollout                         KubeVela        Provides basic batch publishing capability.                                                             [1.3.0, 1.2.4, 1.2.3]           disabled
terraform                       KubeVela        Terraform Controller is a Kubernetes Controller for Terraform.                                          [1.0.6]                         disabled
terraform-aws                   KubeVela        Kubernetes Terraform Controller for AWS                                                                 [1.0.1, 1.0.0]                  disabled
dex                             KubeVela        Enable dex for login                                                                                    [0.6.5]                         disabled
fluxcd                          KubeVela        Extended workload to do continuous and progressive delivery                                             [1.1.0, 1.0.0]                  disabled
velaux                          KubeVela        KubeVela User Experience (UX). An extensible, application-oriented delivery and management Dashboard.   [v1.3.0, v1.3.0-beta.2, 1.2.4]  enabled (v1.3.0)
terraform-alibaba               KubeVela        Kubernetes Terraform Controller for Alibaba Cloud                                                       [1.0.2, 1.0.1]                  disabled
...snip...
- You can refer to addon reference docs for more details of these community certificated addons.
Install Addon
The simplest command for installing one addon is:
vela addon enable fluxcd
The expected output should be:
I0111 21:45:24.553174   89345 apply.go:106] "creating object" name="addon-fluxcd" resource="core.oam.dev/v1beta1, Kind=Application"
I0111 21:45:25.258914   89345 apply.go:106] "creating object" name="helm" resource="core.oam.dev/v1beta1, Kind=ComponentDefinition"
I0111 21:45:25.342731   89345 apply.go:106] "creating object" name="kustomize-json-patch" resource="core.oam.dev/v1beta1, Kind=TraitDefinition"
I0111 21:45:25.382201   89345 apply.go:106] "creating object" name="kustomize-patch" resource="core.oam.dev/v1beta1, Kind=TraitDefinition"
I0111 21:45:25.411723   89345 apply.go:106] "creating object" name="kustomize" resource="core.oam.dev/v1beta1, Kind=ComponentDefinition"
I0111 21:45:25.625815   89345 apply.go:106] "creating object" name="kustomize-strategy-merge" resource="core.oam.dev/v1beta1, Kind=TraitDefinition"
I0111 21:45:25.660129   89345 apply.go:106] "creating object" name="component-uischema-helm" resource="/v1, Kind=ConfigMap"
Addon: fluxcd enabled Successfully.
You can also install addons with some advanced flags.
- Choose one specific version by adding
--versionflag in this command. e.g:
vela addon enable fluxcd --version=1.0.0
- Choose specific clusters for installation. You can use
--clusterflag to choose specific clusters. e.g:
vela addon enable <addon-name> --clusters={cluster1,cluster2}
By default, the place for installation is specified as control plane cluster or managed cluster inside the metadata of addon.
- Some addons support setting parts of parameter while enabling. For example
velauxaddon supports change image repository by settingrepoparameter, then you can change the repo address to your own. e.g:
vela addon enable velaux repo=<your repo address>
Get addon info
If you want to check the detail status of an addon, or get more available parameters and other useful info of an addon, you can use command addon status. For example:
$ vela addon enable velaux --verbose
velaux: disabled
KubeVela User Experience (UX). An extensible, application-oriented delivery and management Dashboard.
==> Registry Name
KubeVela
==> Available Versions
[v1.4.3, v1.4.2, v1.4.0, v1.4.0-beta.2, v1.3.6, v1.3.4, v1.3.3, v1.3.2, ...]
==> Dependencies ✔
[]
==> Parameters
-> dbType: Specify the database type, current support KubeAPI(default) and MongoDB.
        default: "kubeapi"
        required: ✔
-> dbURL: Specify the MongoDB URL. it only enabled where DB type is MongoDB.
-> gatewayDriver: Specify the gateway type.
        default: "nginx"
        required: ✔
-> imagePullSecrets: Specify the names of imagePullSecret for private image registry, eg. "{a,b,c}"
-> serviceType: Specify the service type.
        default: "ClusterIP"
        required: ✔
-> database: Specify the database name, for the kubeapi db type, it represents namespace.
-> dex: Specify whether to enable the dex
        default: "false"
        required: ✔
-> domain: Specify the domain, if set, ingress will be created if the gateway driver is nginx.
-> repo: Specify the image hub of velaux, eg. "acr.kubevela.net"
-> serviceAccountName: Specify the serviceAccountName for apiserver
        default: "kubevela-vela-core"
        required: ✔
As above shows, these infos contain the available parameters, available versions, dependent addons and description of and addon.
Discover the capabilities installed
Once addon installed, end user can discover and use these capabilities immediately.
Generally, end user can list the new component or trait types added by
vela componentorvela trait. Refer to Lifecycle of a Definition for more usage details.You can also check the capability details of community addon docs.
Uninstall Addon
Please make sure the addon along with its capabilities is no longer used in any of your applications before uninstalling it.
vela addon disable fluxcd
Expect output:
Successfully disable addon:fluxcd
Manage Addon Registry
You can also manage the addon registries, such as adding/deleting your private addon registry. Let's take the experimental community registry as example.
- List your current registries
$ vela addon registry list
Name            Type    URL
KubeVela        helm    https://addons.kubevela.net
- Add a new registry
$ vela addon registry add experimental --type=helm --endpoint=https://addons.kubevela.net/experimental/
Successfully add an addon registry experimental
- Delete one registry
$ vela addon registry delete experimental
Successfully delete an addon registry experimental
Build custom registry
You can use ChartMuseum to build your custom addon registry. We have a ChartMuseum addon available. Please refer to Build your Own Registry for details.
Air-Gapped Installation for Addon
If your cluster network cannot connect to the community addon registry you can:
- build your custom addon registry. Please refer to Build your Own Registry for details.
- enable an addon from a local directory. Example:
$ tree velaux -L 1
velaux
├── metadata.yaml
├── readme_cn.md
├── readme.md
├── resources
├── schemas
└── template.yaml

2 directories, 4 files

$ vela addon enable ./velaux
Addon: velaux enabled successfully
Please notice that, while an addon is being installed in a cluster, it maybe still need pull some images or Helm Charts. If your cluster cannot reach these resources please refer docs to complete installation without Internet access.
Manage the addon with UI Console
If you have installed VelaUX which is also one of the addon, you can manage it directly on the UI console with admin privileges.
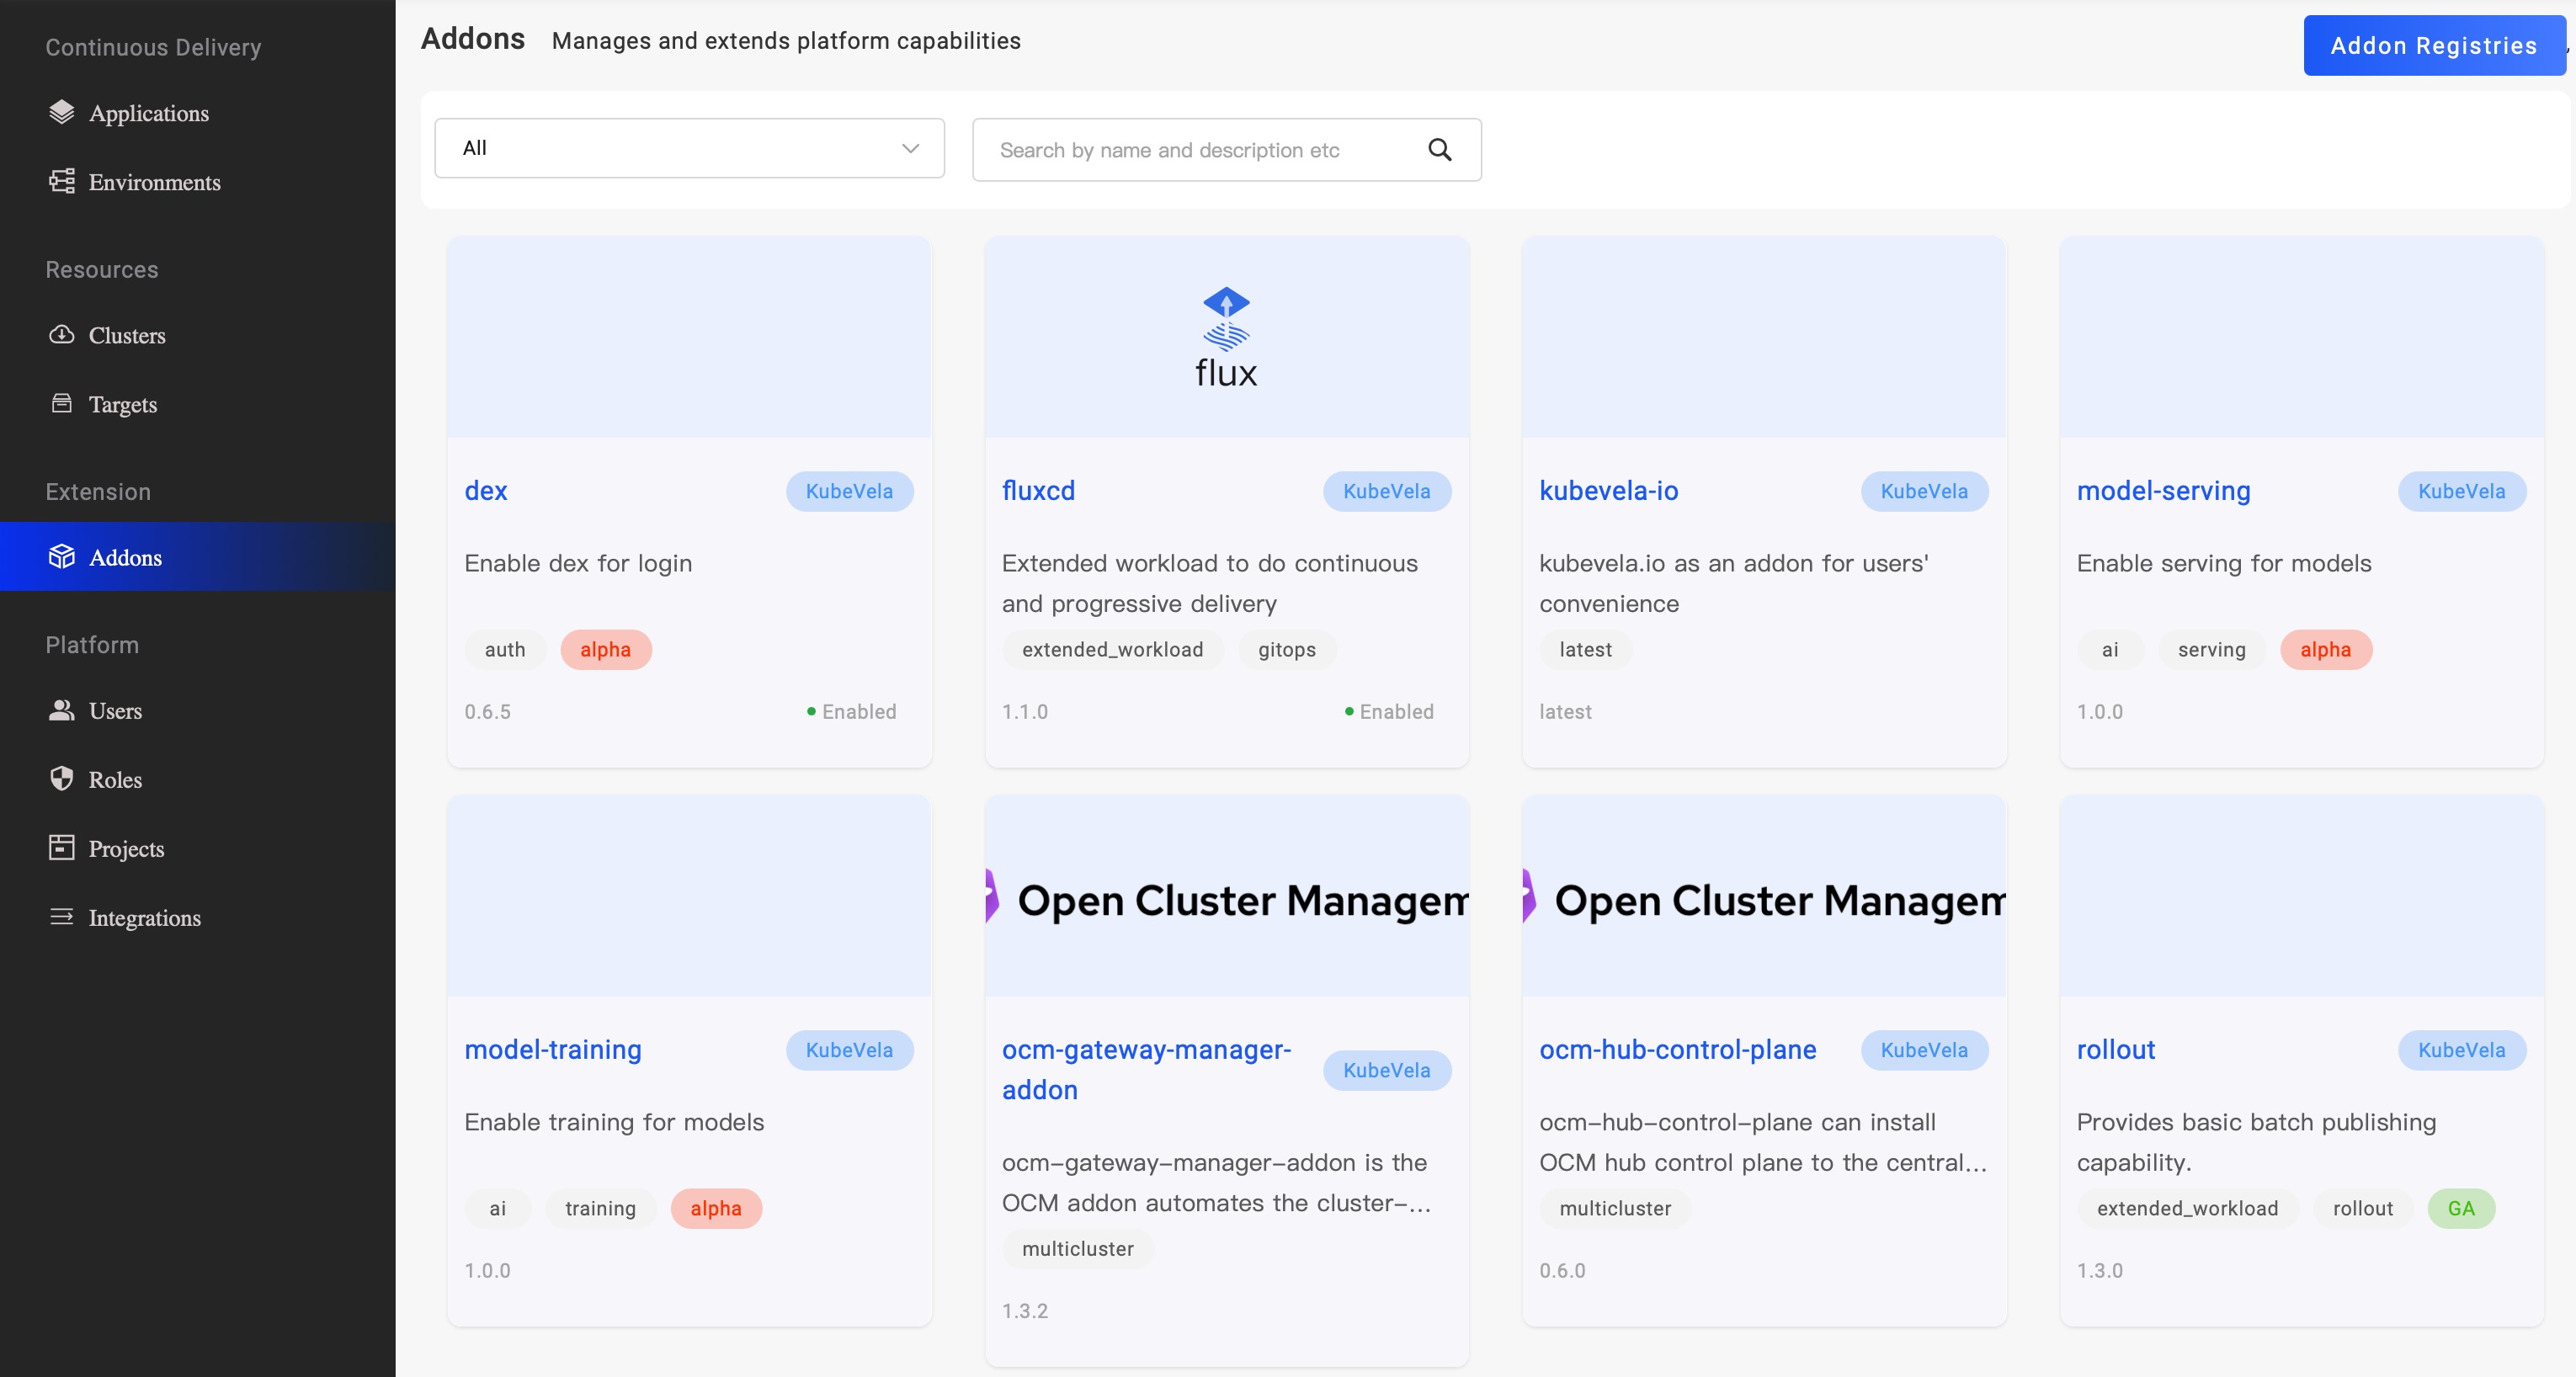
In the addon list, you can get the status of the addon and other info. Click the addon name could open the addon detail page, you can get the version list, definitions provided by the addon, and the readme message.
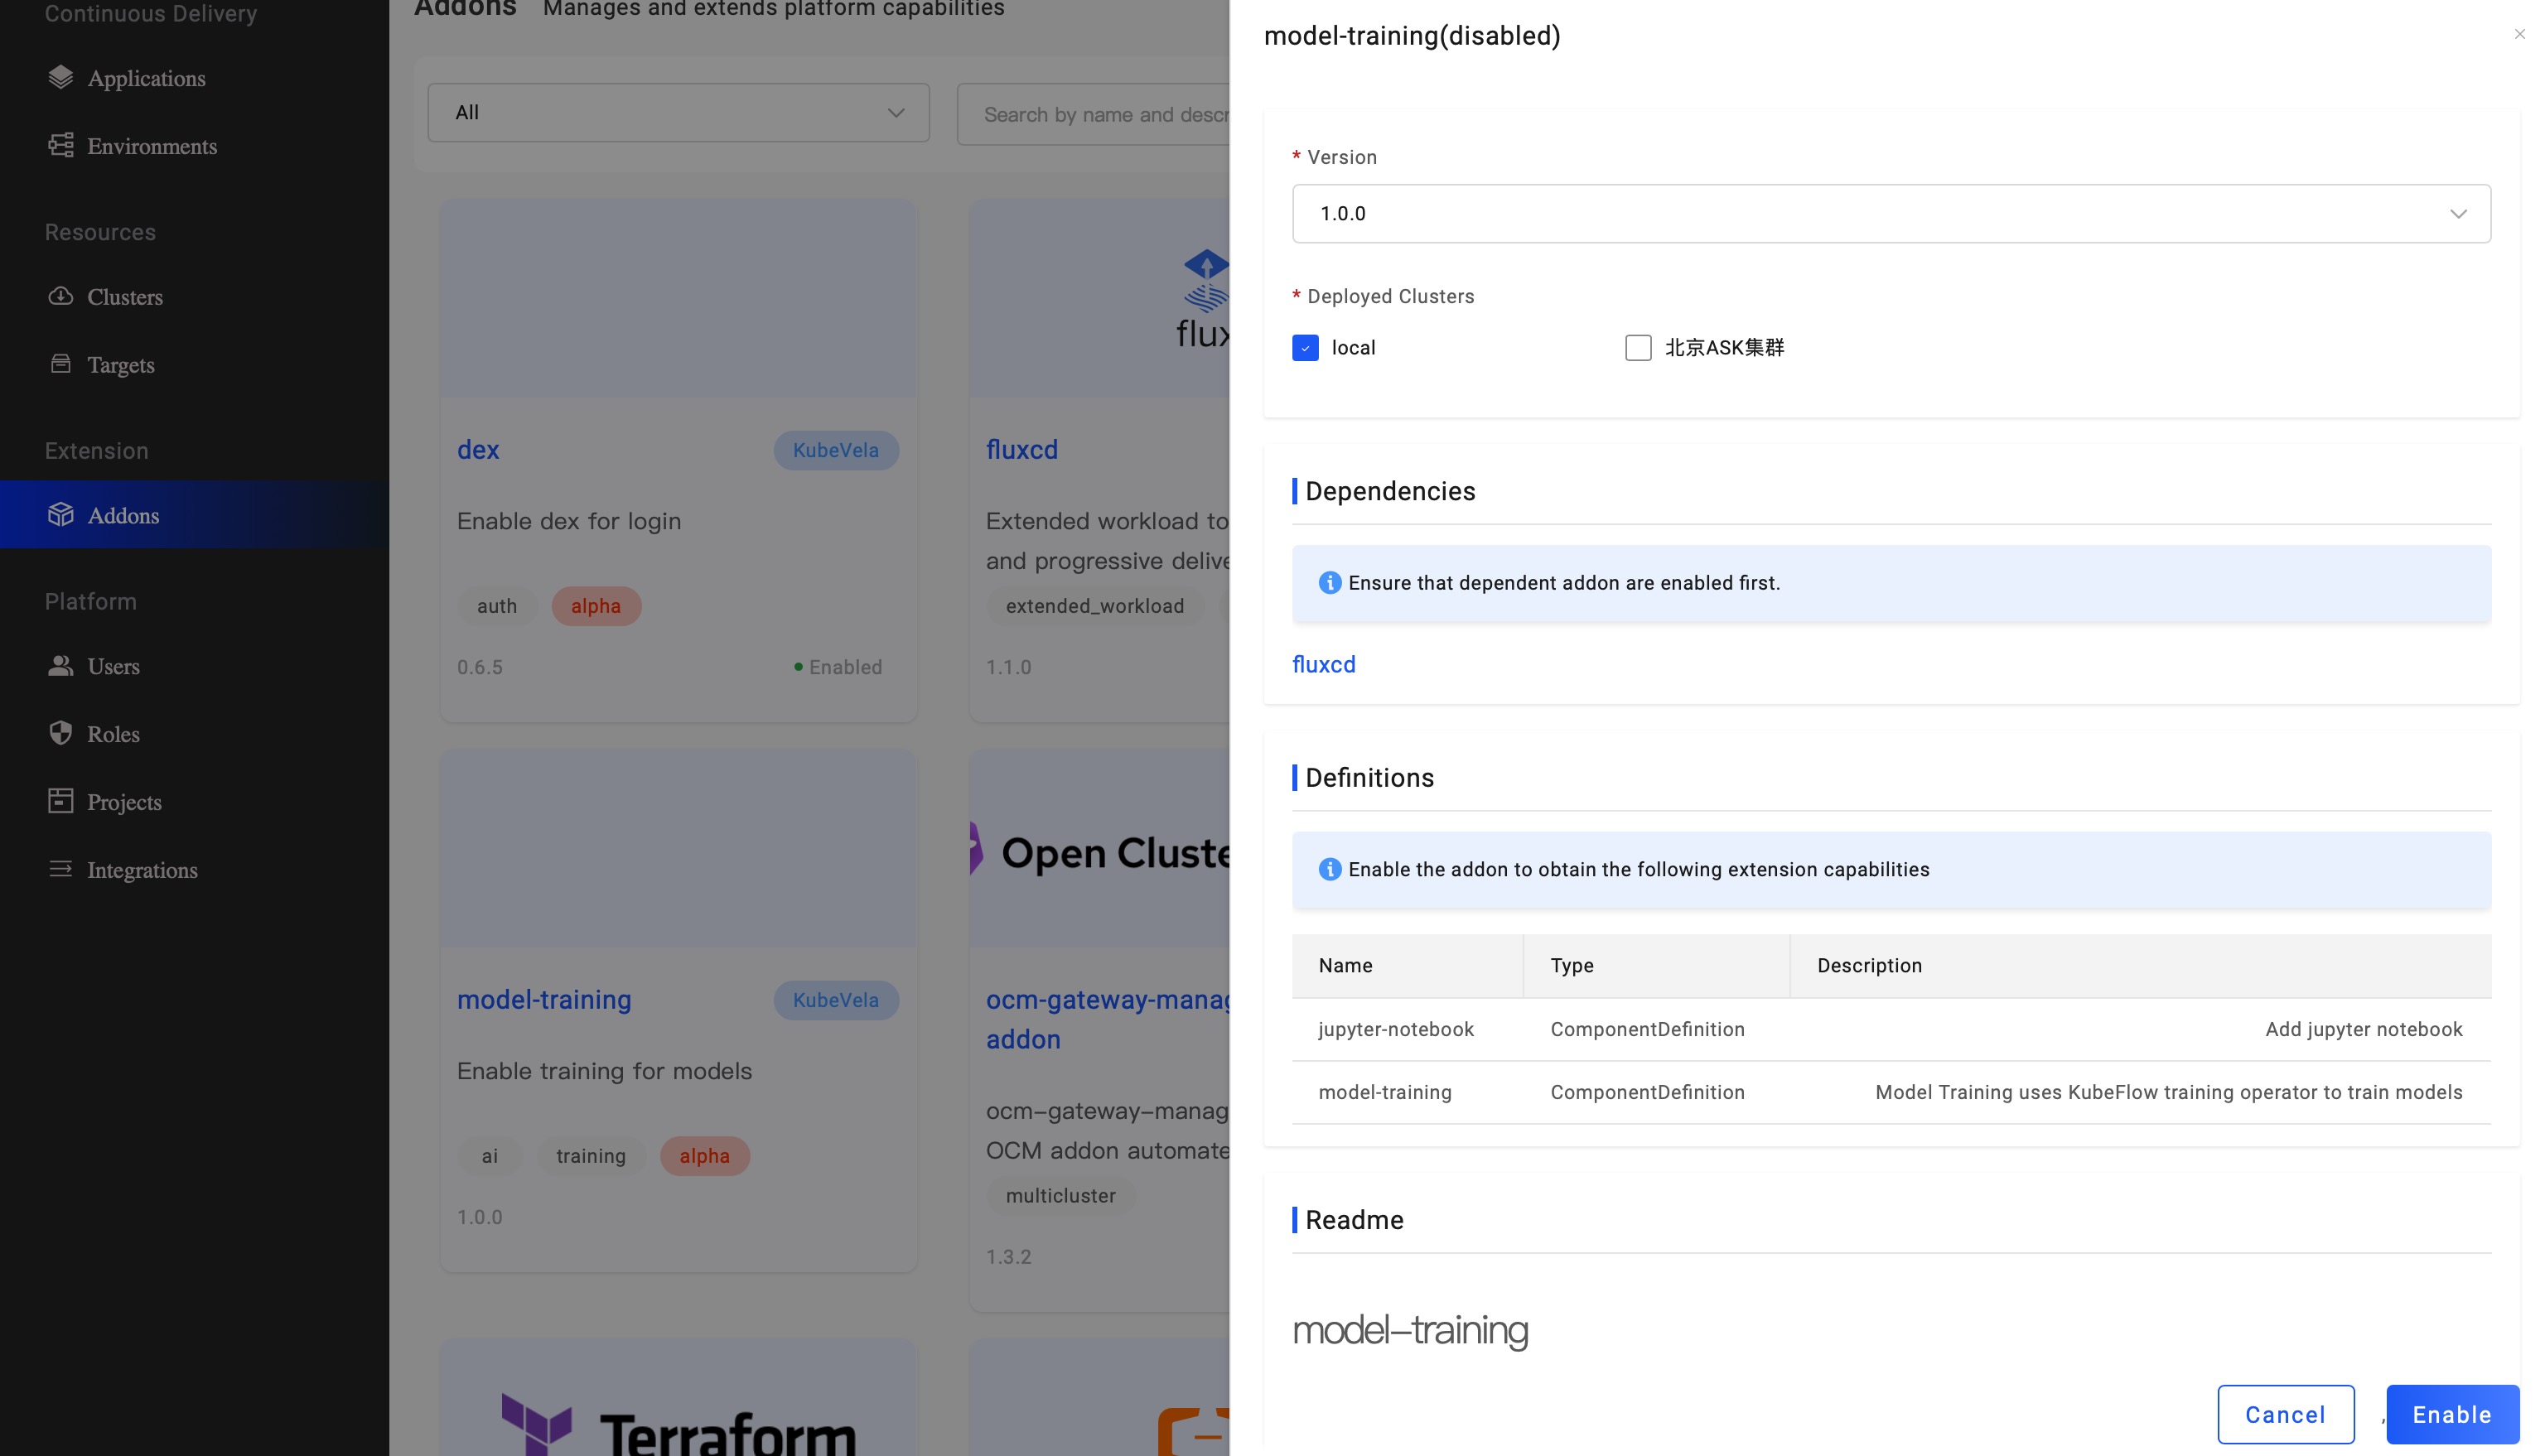
Select a version and deployed clusters, you can click the enable button to install this addon. You can check detail information in this section include:
- Definitions: The extension capabilities provided by the addon may include component, trait, etc.
- README: Addon description, explain the capabilities and related information.
For enabled addons, if no applications to use definitions, you can click the disable button to uninstall it.
Make your own addon
If you're a system infra or operator, you can refer to extension documents to learn how to make your own addon and registry, including extend cloud resources by addon.
Extend KubeVela as a Developer
If you're extremely interested in KubeVela, you can also extend more features as a developer.
- KubeVela use CUE as it's core engine, learn CUE in KubeVela and try to extend with CUE configurations.
- Read the developer guide to learn how to contribute and extend capabilities for KubeVela.
Welcome to join the KubeVela community! We're eager to see you to contribute your extension.