KubeVela bridges the gap between applications and infrastructures, enabling easy delivery and management of development codes. Compared to Kubernetes objects, the Application in KubeVela better abstracts and simplifies the configurations which developers care about, and leave complex infrastruature capabilities and orchestration details to platform engineers. The KubeVela apiserver further exposes HTTP interfaces, which help developers to deploy applications even without Kubernetes cluster access.
This article will use Jenkins, a popular continuous integration tool, as basis and give a brief introduction to how to build GitOps-based application continuous delivery highway.
Continuous Delivery Highway
As application developer, you might care more about whether your application is functioning correctly and if development is convenient. There will be several system components on this highway to help you achieve that.
- First, you need a git repo to place program codes, test codes and a YAML file to declare your KubeVela application.
- Second, you also need a continuous integration tool to help you automate the integration test of codes, build container images and push images to image repo.
- Finally, you need to have a Kubernetes cluster and install KubeVela in it, with its apiserver function enabled.
Currently, the access management for KubeVela apiserver is under construction. You will need to configure apiserver access in later version of KubeVela (after v1.1).
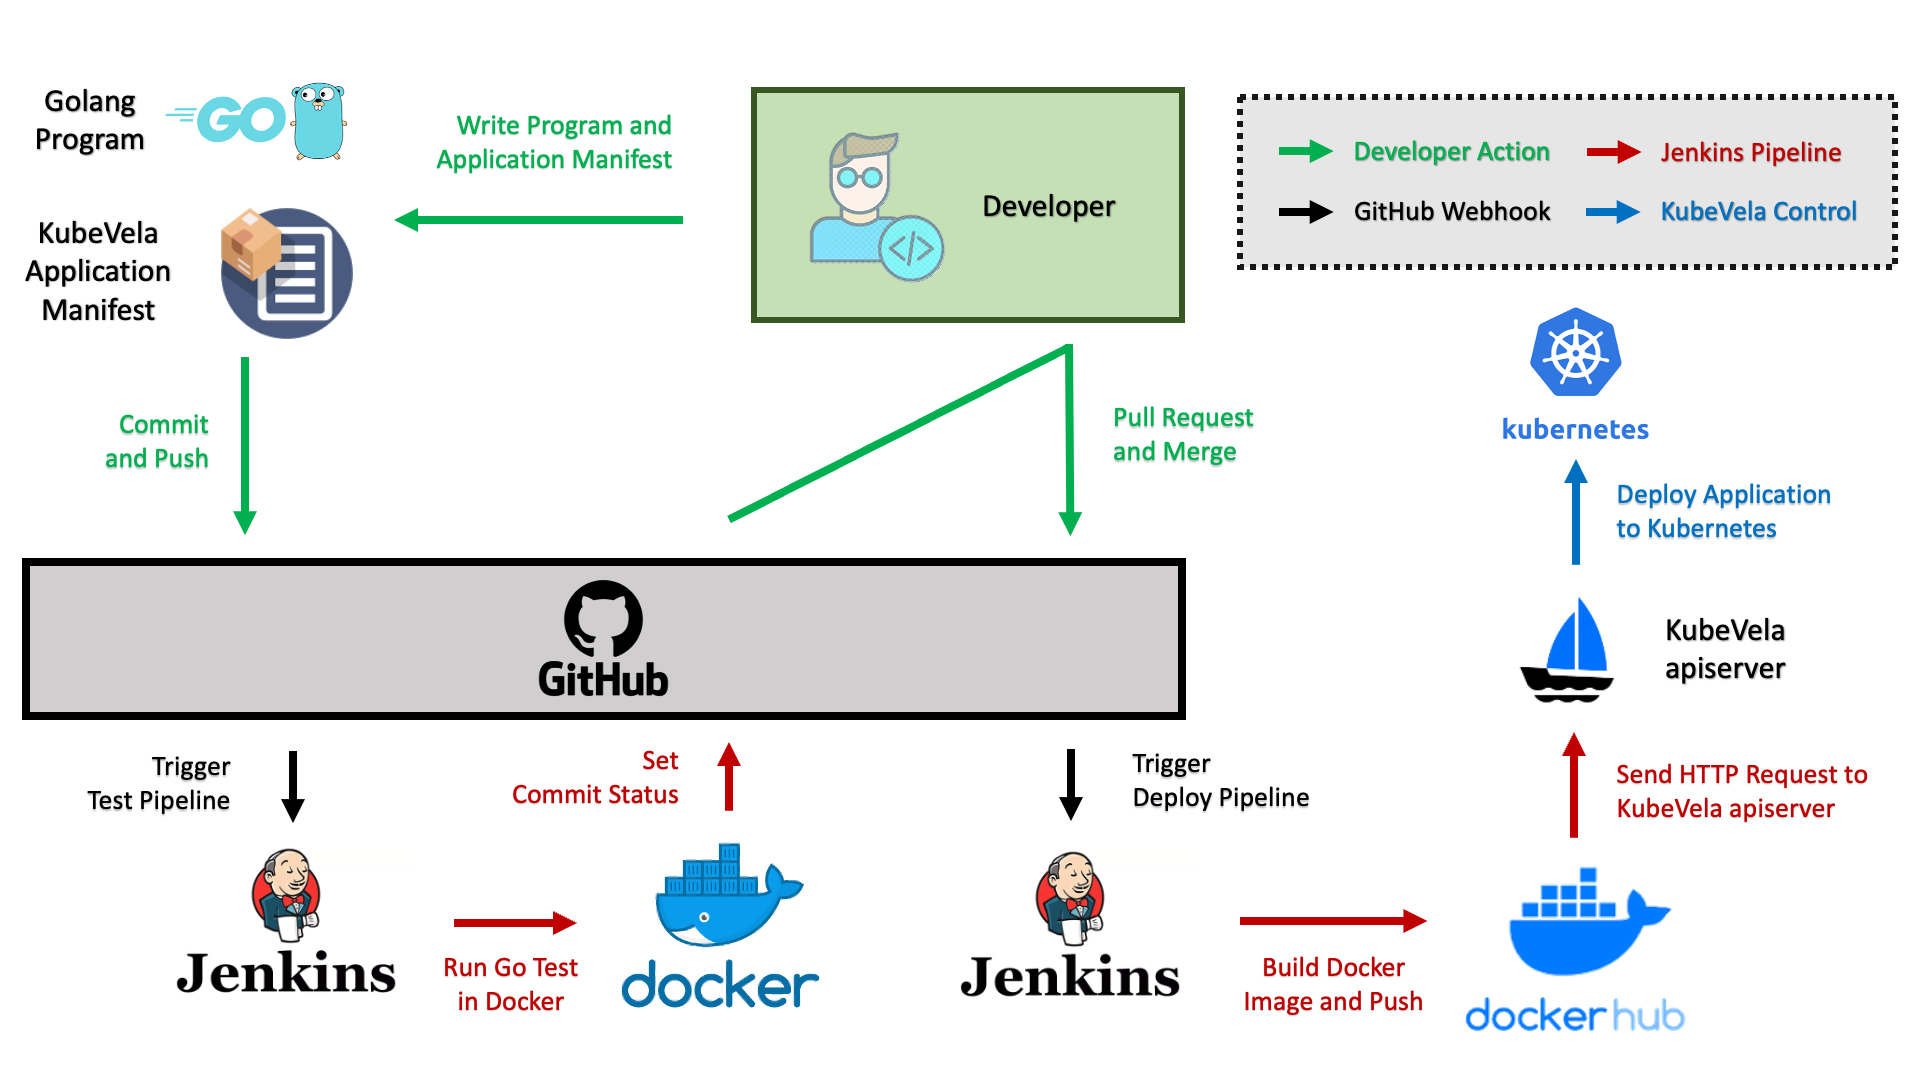
In this article, we adopt GitHub as the git repo, Jenkins as the CI tool, DockerHub as the image repo. We use a simple HTTP Server written in Golang as example. The whole process of continuous delivery is shown as below. We can see that on this highway of continuous delivery, developers only need to care about application development and managing code version with Git. The highway will help developer run integration test and deploy applications into target Kubernetes cluster automatically.
Set-up Environment
Jenkins
This article takes Jenkins as the CI tool. Developers can choose other CI tools like Travis or GitHub Action.
First you need to set up Jenkins to deploy CI pipelines. The installation and initialization of Jenkins could refer to the official docs.
Notice that since the CI pipeline in this example is based on Docker and GitHub, you need to install related plugins in Jenkins (Dashboard > Manage Jenkins > Manage Plugins), including Pipeline、HTTP Request Plugin、Docker Pipeline、Docker Plugin.
Besides, you also need to configure Docker environment for Jenkins to use (Dashboard > Manage Jenkins > Configure System > Docker Builder). If Docker has already been installed, you can set Docker URL as unix:///var/run/docker.sock.
Since the docker image will be pushed to image repo during the running of CI pipelines, you also need to store image repo accounts in Jenkins Credintial (Dashboard > Manage Jenkins > Manage Credentials > Add Credentials), such as DockerHub username and password.
GitHub
This example uses GitHub as git repo. Developer can change it to other repos on demand, such as Gitlab.
To enable Jenkins to retrieve GitHub updates and write pipeline status back to GitHub, you need to execute the following two steps in GitHub.
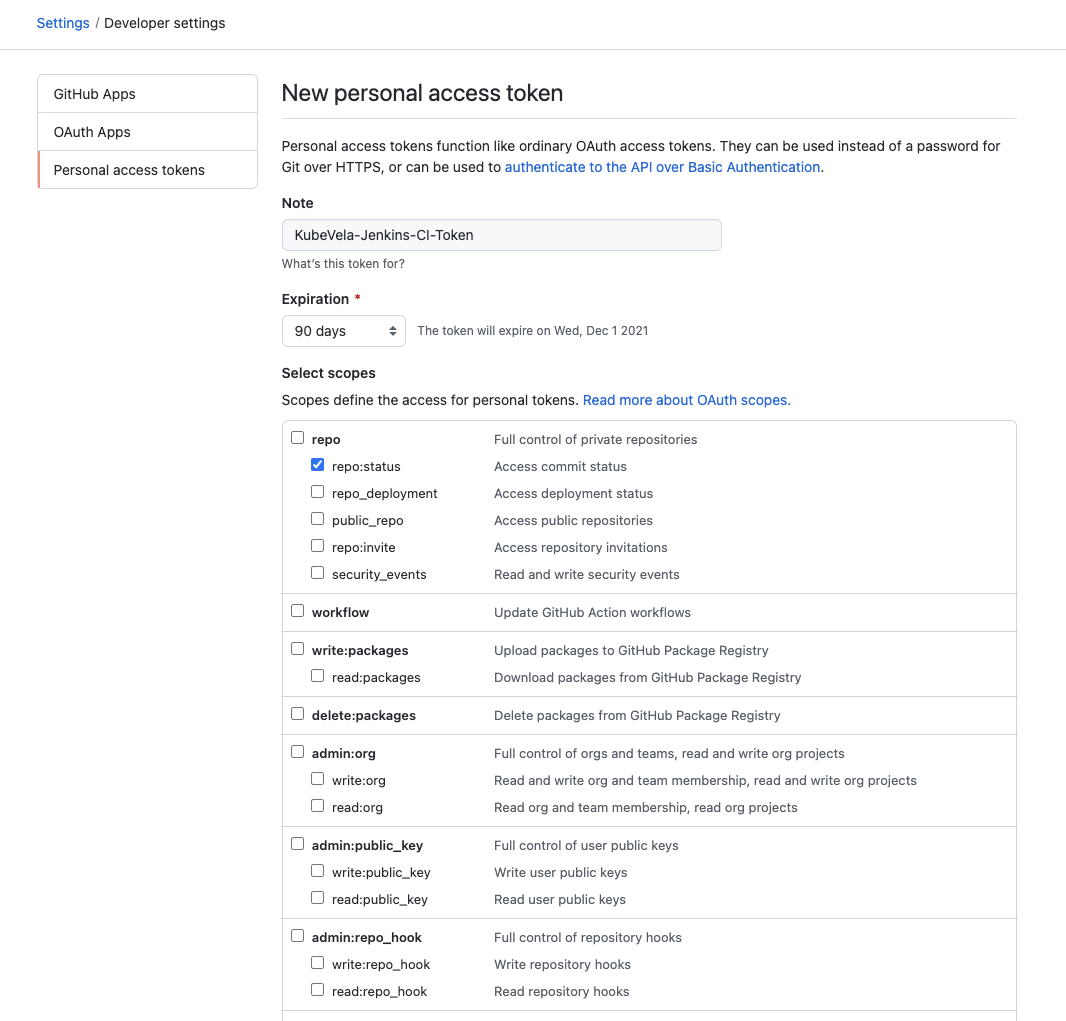
- Configure Personal Access Token. Notice to check
repo:statusto get the permission for writing commit status.
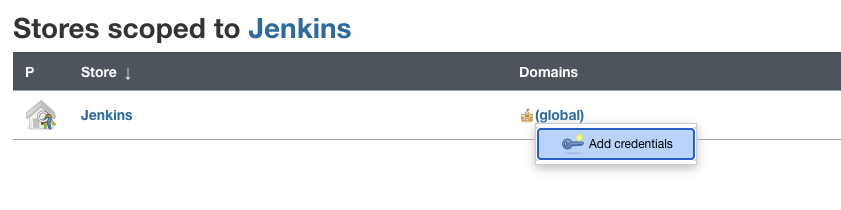
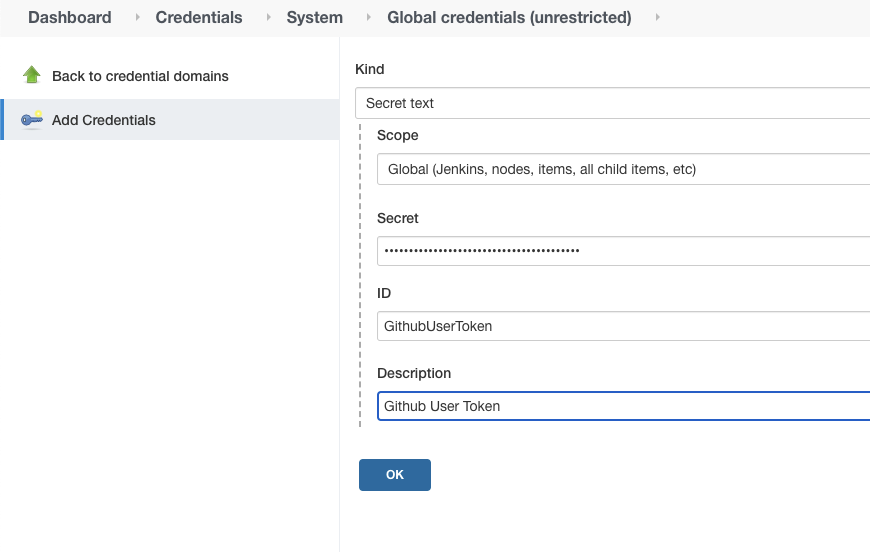
Then fill Personal Access Token from GitHub in Jenkins Credential (with Secret Text type).
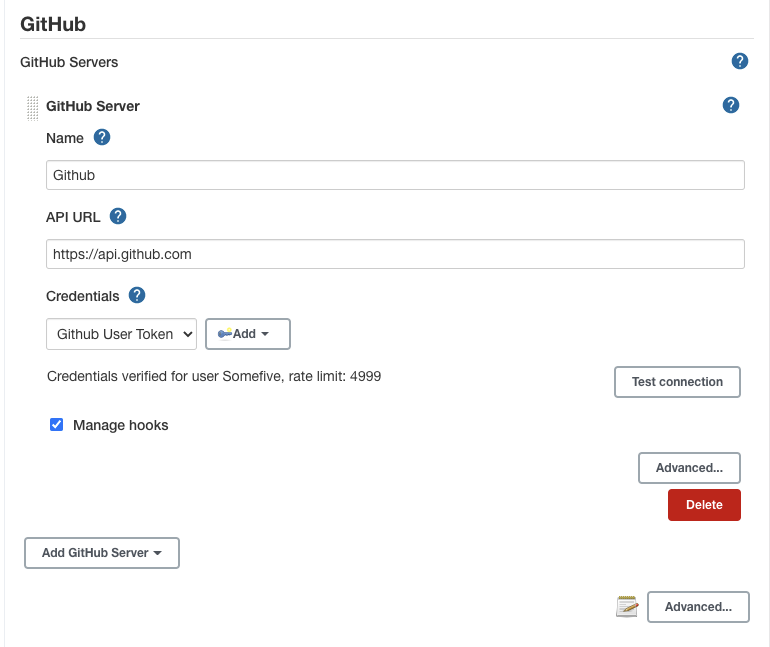
Finally, go to Dashboard > Manage Jenkins > Configure System > GitHub in Jenkins and click Add GitHub Server to fill the newly created credential in. You can click Test connection to check if the configuration is correct.
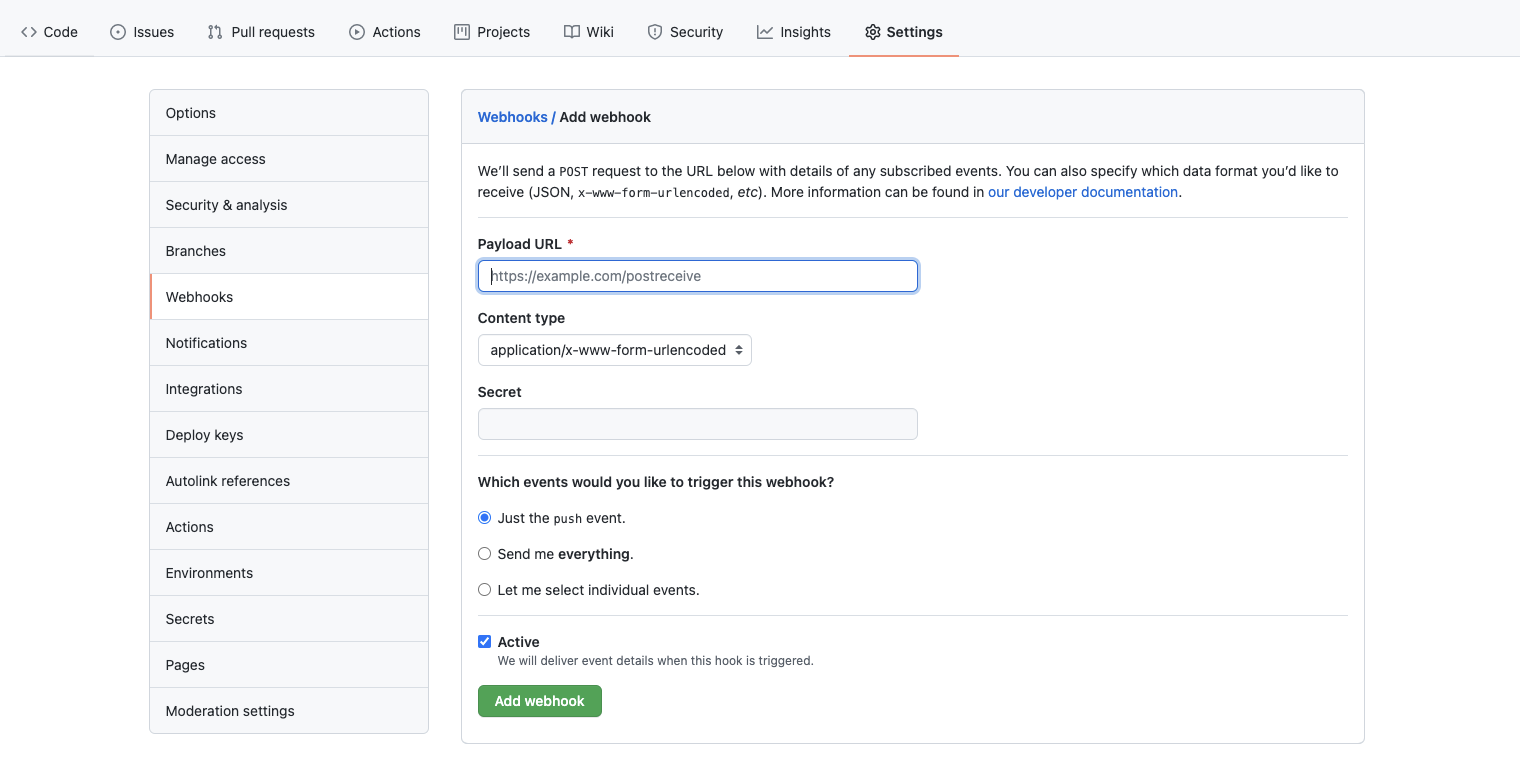
- Add Webhook to GitHub code repo settings. Fill Jenkins Webhook address into it. For example, http://my-jenkins.example.com/github-webhook/ . In this way, all Push events in this code repo will be pushed to Jenkins.
KubeVela
You need to install KubeVela in your Kubernetes cluster and enable the apiserver function. Refer to official doc for details.
Composing Applications
We use a simple HTTP Server as example. Here, we declare a constant named VERSION and print it when accessing the HTTP service. A simple test is also set up, which can be used to validate the format of VERSION.
// main.go

package main

import (
    "fmt"
    "net/http"
)

const VERSION = "0.1.0-v1alpha1"

func main() {
    http.HandleFunc("/", func(w http.ResponseWriter, r *http.Request) {
        _, _ = fmt.Fprintf(w, "Version: %s\n", VERSION)
    })
    if err := http.ListenAndServe(":8088", nil); err != nil {
        println(err.Error())
    }
}
// main_test.go

package main

import (
    "regexp"
    "testing"
)

const verRegex string = `^v?([0-9]+)(\.[0-9]+)?(\.[0-9]+)?` +
    `(-([0-9A-Za-z\-]+(\.[0-9A-Za-z\-]+)*))?` +
    `(\+([0-9A-Za-z\-]+(\.[0-9A-Za-z\-]+)*))?$`

func TestVersion(t *testing.T) {
    if ok, _ := regexp.MatchString(verRegex, VERSION); !ok {
        t.Fatalf("invalid version: %s", VERSION)
    }
}
To build container image for the HTTP server and publishing it as KubeVela Application into Kubernetes, we also need another two files Dockerfile and app.yaml in the code repo. They are used to describe how container image is built and configure the KubeVela Application respectively.
# Dockerfile
FROM golang:1.13-rc-alpine3.10 as builder
WORKDIR /app
COPY main.go .
RUN go build -o kubevela-demo-cicd-app main.go

FROM alpine:3.10
WORKDIR /app
COPY --from=builder /app/kubevela-demo-cicd-app /app/kubevela-demo-cicd-app
ENTRYPOINT ./kubevela-demo-cicd-app
EXPOSE 8088
In app.yaml, we declare the application should contain 5 replica and expose the service through Ingress. The labels trait is used to tag Application Pods with current git commit id. Then the delivery pipeline in Jenkins will inject GIT_COMMIT into it and submit the Application configuration to KubeVela apiserver. Then the updates for Application will be triggered. The application will update 2 replica first, then hang and wait for manual approve. After developer confirms the change is valid, the rest 3 replica will be updated. This canary release is configured by the rollout trait declared in the Application.
# app.yaml
apiVersion: core.oam.dev/v1beta1
kind: Application
metadata:
  name: kubevela-demo-app
spec:
  components:
    - name: kubevela-demo-app-web
      type: webservice
      properties:
        image: somefive/kubevela-demo-cicd-app
        imagePullPolicy: Always
        port: 8080
      traits:
        - type: rollout
          properties:
            rolloutBatches:
              - replicas: 2
              - replicas: 3
            batchPartition: 0
            targetSize: 5
        - type: labels
          properties:
            jenkins-build-commit: GIT_COMMIT
        - type: ingress
          properties:
            domain: kubevela-demo-cicd-app.cf7c0ed25b151437ebe1ef58efc29bca4.us-west-1.alicontainer.com
            http:
              "/": 8088
Configure CI pipelines
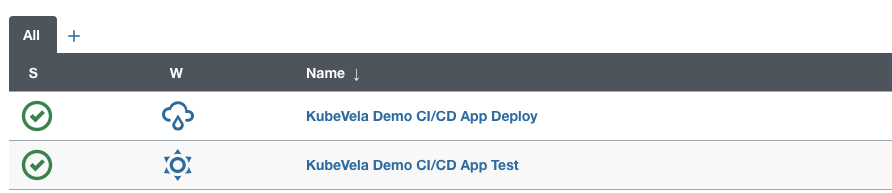
In this article, we set up two pipelines in Jenkins. One is the test pipeline, which is for running tests for application codes. The other one is the delivery pipeline, which builds container images and uploads them to image repo. Then the application configuration will be updated.
Test Pipeline
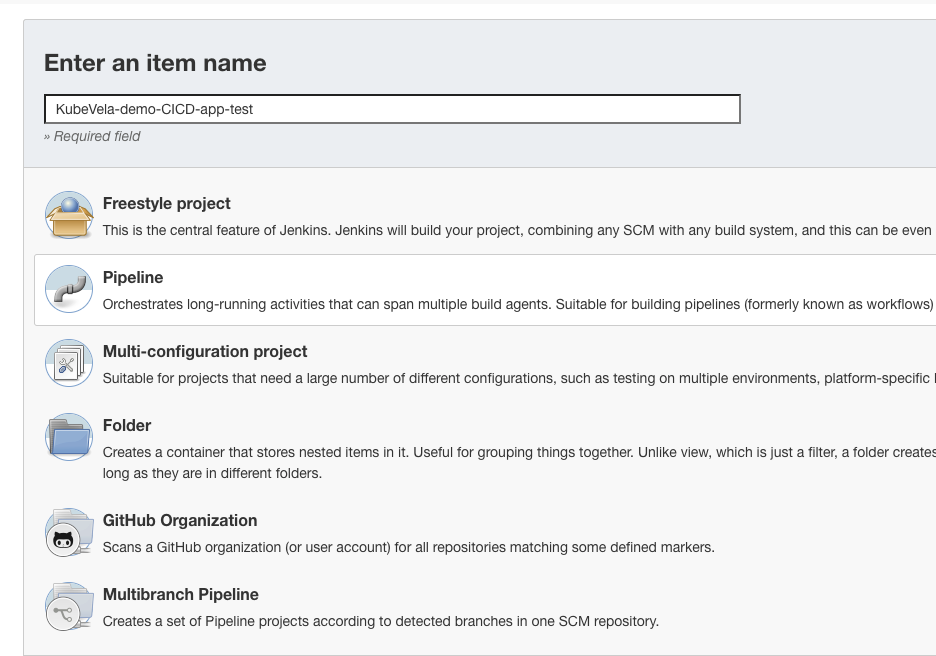
Create a new pipeline in Jenkins. Set Build Triggers as GitHub hook trigger for GITScm polling.
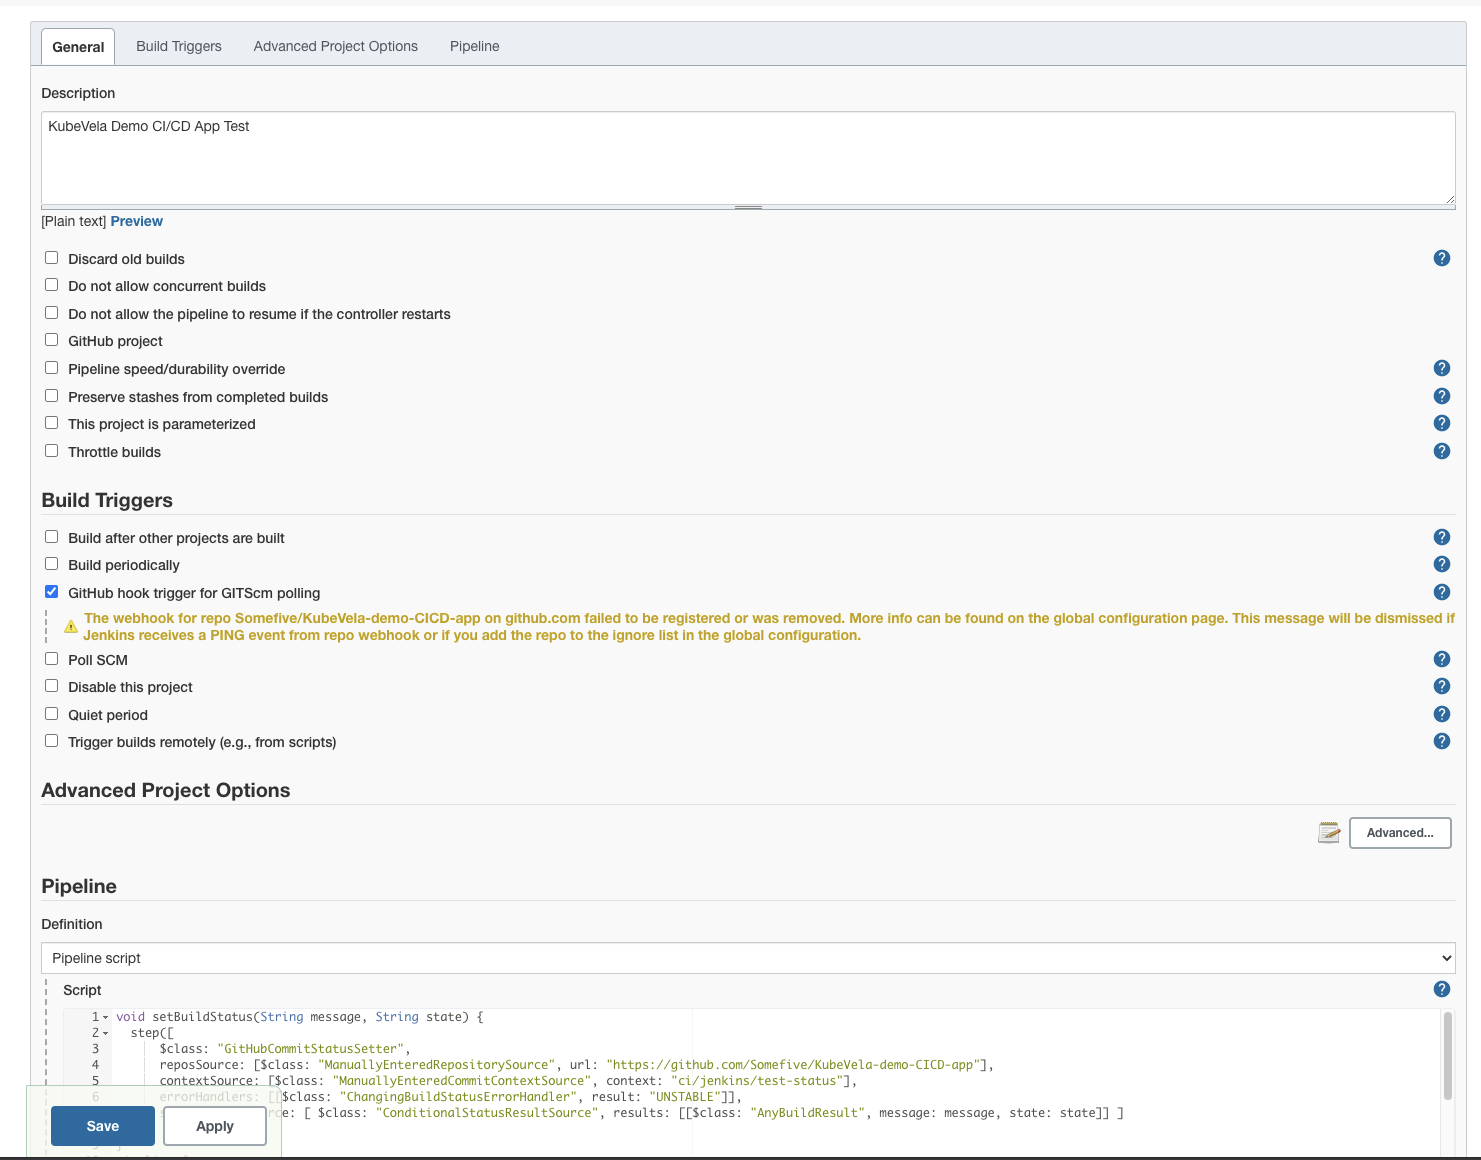
This pipeline uses golang image as execution environment at first. Next, it checkouts the dev branch of the target GitHub repo, indicating that this pipeline will be triggered by push events to dev branch. The piepline status will be written back to GitHub after execution finished.
void setBuildStatus(String message, String state) {
  step([
      $class: "GitHubCommitStatusSetter",
      reposSource: [$class: "ManuallyEnteredRepositorySource", url: "https://github.com/Somefive/KubeVela-demo-CICD-app"],
      contextSource: [$class: "ManuallyEnteredCommitContextSource", context: "ci/jenkins/test-status"],
      errorHandlers: [[$class: "ChangingBuildStatusErrorHandler", result: "UNSTABLE"]],
      statusResultSource: [ $class: "ConditionalStatusResultSource", results: [[$class: "AnyBuildResult", message: message, state: state]] ]
  ]);
}
pipeline {
    agent {
        docker { image 'golang:1.13-rc-alpine3.10' }
    }
    stages {
        stage('Prepare') {
            steps {
                script {
                    def checkout = git branch: 'dev', url: 'https://github.com/Somefive/KubeVela-demo-CICD-app.git'
                    env.GIT_COMMIT = checkout.GIT_COMMIT
                    env.GIT_BRANCH = checkout.GIT_BRANCH
                    echo "env.GIT_BRANCH=${env.GIT_BRANCH},env.GIT_COMMIT=${env.GIT_COMMIT}"
                }
                setBuildStatus("Test running", "PENDING");
            }
        }
        stage('Test') {
            steps {
                sh 'CGO_ENABLED=0 GOCACHE=$(pwd)/.cache go test *.go'
            }
        }
    }
    post {
        success {
            setBuildStatus("Test success", "SUCCESS");
        }
        failure {
            setBuildStatus("Test failed", "FAILURE");
        }
    }
}
Delivery Pipeline
The delivery pipeline, similar to the test pipeline, first pulls codes in prod branch of the git repo. Then use Docker to build images and push it to remote image repo. (Here we use DockerHub, the withRegistry function takes image repo location and the Credential ID of the repo as parameters). After image been built, the pipeline converts Application YAML file into JSON file, with GIT_COMMIT injected. Finally, the pipeline sends POST requests to KubeVela apiserver (here is http://47.88.24.19/) for creating or updating target application.
Currently, KubeVela apiserver takes JSON object as inputs. Therefore we do extra conversion in the delivery pipeline. In the future, the KubeVela apiserver will further improve and simplify this interaction process. The admission management will be added as well to address the security issue.
In this case we will create an application named cicd-demo-app in Namespace kubevela-demo-namespace. Notice that the Namespace need to be created in Kubernetes in advance. KubeVela apiserver will simplify it in later version.
void setBuildStatus(String message, String state) {
  step([
      $class: "GitHubCommitStatusSetter",
      reposSource: [$class: "ManuallyEnteredRepositorySource", url: "https://github.com/Somefive/KubeVela-demo-CICD-app"],
      contextSource: [$class: "ManuallyEnteredCommitContextSource", context: "ci/jenkins/deploy-status"],
      errorHandlers: [[$class: "ChangingBuildStatusErrorHandler", result: "UNSTABLE"]],
      statusResultSource: [ $class: "ConditionalStatusResultSource", results: [[$class: "AnyBuildResult", message: message, state: state]] ]
  ]);
}
pipeline {
    agent any
    stages {
        stage('Prepare') {
            steps {
                script {
                    def checkout = git branch: 'prod', url: 'https://github.com/Somefive/KubeVela-demo-CICD-app.git'
                    env.GIT_COMMIT = checkout.GIT_COMMIT
                    env.GIT_BRANCH = checkout.GIT_BRANCH
                    echo "env.GIT_BRANCH=${env.GIT_BRANCH},env.GIT_COMMIT=${env.GIT_COMMIT}"
                    setBuildStatus("Deploy running", "PENDING");
                }
            }
        }
        stage('Build') {
            steps {
                script {
                    docker.withRegistry("https://registry.hub.docker.com", "DockerHubCredential") {
                        def customImage = docker.build("somefive/kubevela-demo-cicd-app")
                        customImage.push()
                    }
                }
            }
        }
        stage('Deploy') {
            steps {
                sh 'wget -q "https://github.com/mikefarah/yq/releases/download/v4.12.1/yq_linux_amd64"'
                sh 'chmod +x yq_linux_amd64'
                script {
                    def app = sh (
                        script: "./yq_linux_amd64 eval -o=json '.spec' app.yaml | sed -e 's/GIT_COMMIT/$GIT_COMMIT/g'",
                        returnStdout: true
                    )
                    echo "app: ${app}"
                    def response = httpRequest acceptType: 'APPLICATION_JSON', contentType: 'APPLICATION_JSON', httpMode: 'POST', requestBody: app, url: "http://47.88.24.19/v1/namespaces/kubevela-demo-namespace/applications/cicd-demo-app"
                    println('Status: '+response.status)
                    println('Response: '+response.content)
                }
            }
        }
    }
    post {
        success {
            setBuildStatus("Deploy success", "SUCCESS");
        }
        failure {
            setBuildStatus("Deploy failed", "FAILURE");
        }
    }
}
NOTE: the deploy stage is written with KubeVela v1.1. The apiserver interaction method is updated in KubeVela v1.2, leveraging VelaUX (the UI dashboard) and webhook trigger. If you are using KubeVela v1.2.0+, you should refer to the latest documents.
Performance
After finishing the configuration process described above, the whole process of continuous delivery has already been set up. Let's check how it works.
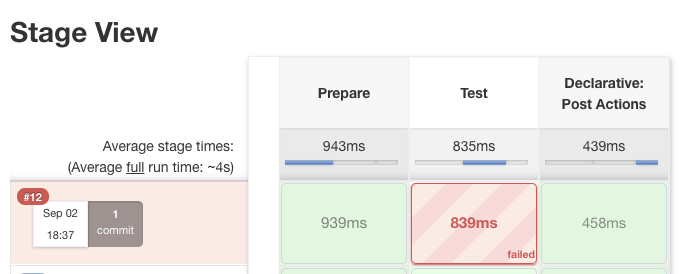
First, we set the VERSION constant in main.go to Bad Version Number, aka,
const VERSION = "Bad Version Number"
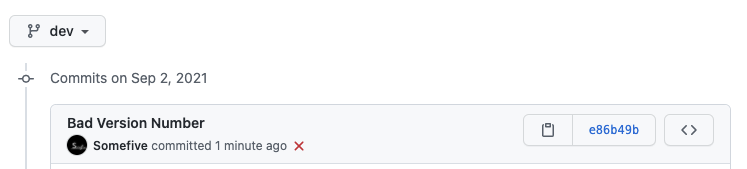
Then, we submit this change to dev branch. We can see that the test pipeline in Jenkins is triggered and the failure status is written back to GitHub.
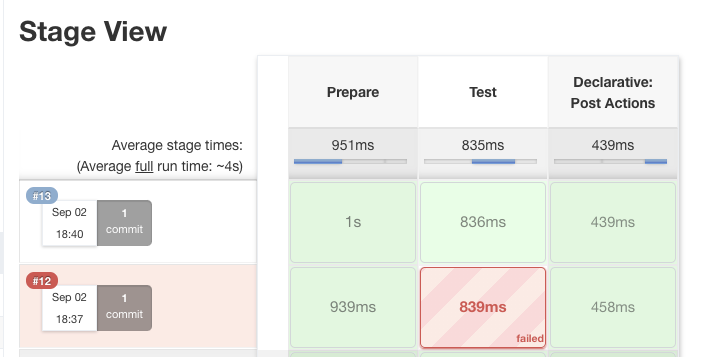
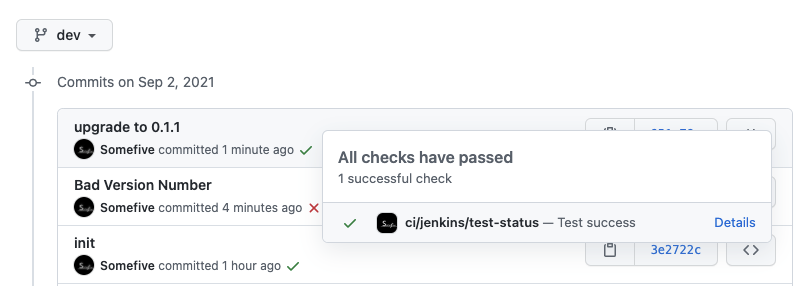
We edit the VERSION to 0.1.1 again and resubmit it. Now we see that the test pipeline is successfully executed, with the commit in GitHub marked as succeeded.
Then we issue a Pull Request to merge dev branch into prod branch.
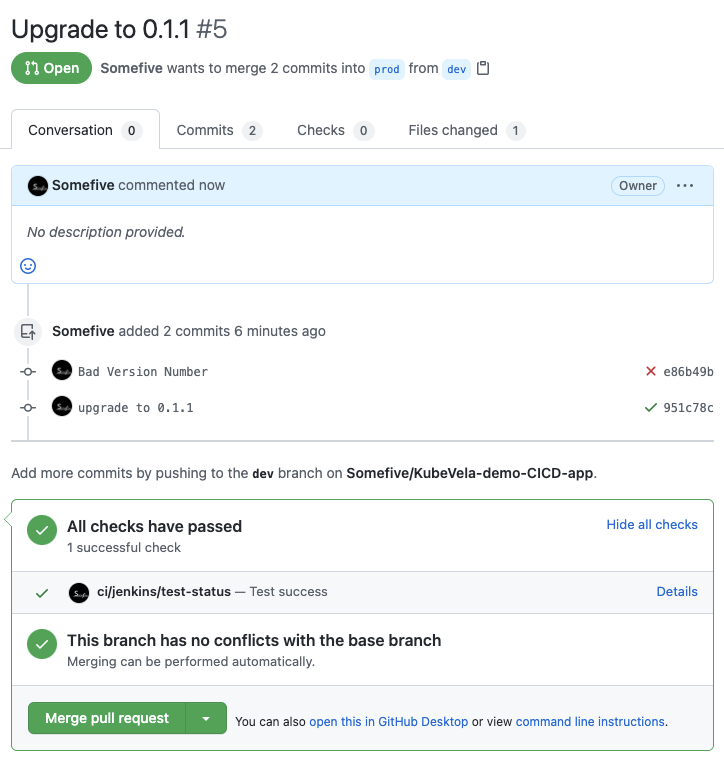
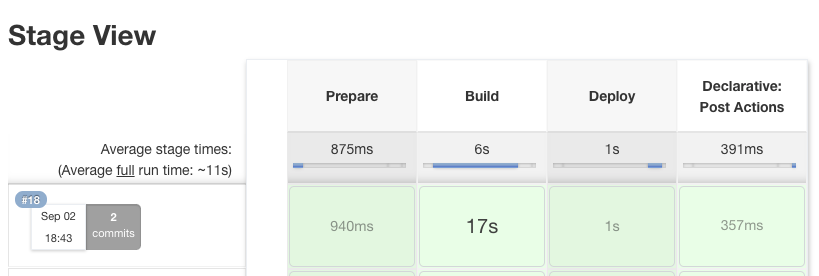
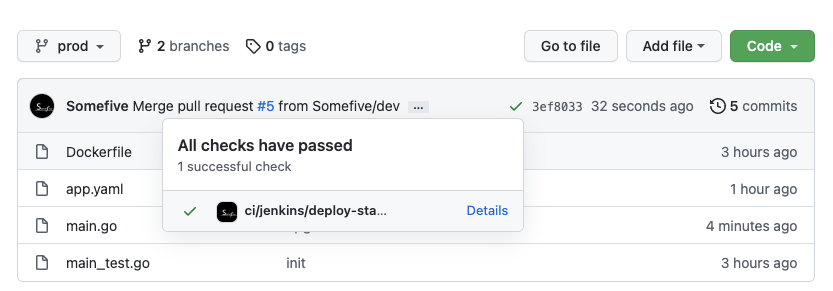
The Jenkins delivery pipeline is triggered once the Pull Request is accepted. After execution finished, the latest commit in prod branch is also marked as succeeded.
$ kubectl get app -n kubevela-demo-namespace
NAME                     COMPONENT               TYPE         PHASE     HEALTHY   STATUS   AGE
kubevela-demo-cicd-app   kubevela-demo-app-web   webservice   running   true               112s
$ kubectl get deployment -n kubevela-demo-namespace
NAME                       READY   UP-TO-DATE   AVAILABLE   AGE
kubevela-demo-app-web-v1   2/2     2            2           2m1s
As shown above, the target application is successfully accepted by KubeVela apiserver and related resources are created by KubeVela controller. The current replica number of Deployment is 2. After deleting batchPartition : 0 in the rollout trait of the application, which means confirming current release, the Deployment replica is updated to 5. Now we can access the domain configured in Ingress and get the current version number.
$ kubectl edit app -n kubevela-demo-namespace
application.core.oam.dev/kubevela-demo-cicd-app edited
$ kubectl get deployment -n kubevela-demo-namespace -w
NAME                       READY   UP-TO-DATE   AVAILABLE   AGE
kubevela-demo-app-web-v1   4/5     5            4           3m39s
kubevela-demo-app-web-v1   5/5     5            5           3m39s
kubevela-demo-app-web-v1   5/5     5            5           3m40s
kubevela-demo-app-web-v1   5/5     5            5           3m40s
$ curl http://kubevela-demo-cicd-app.cf7c0ed25b151437ebe1ef58efc29bca4.us-west-1.alicontainer.com/
Version: 0.1.1
Repeat the steps above. Upgrade the version number to 0.1.2. Finish both test pipeline and delivery pipeline. Then we will see there is a version change to the Deployment managed by the target application. The replica number of the old Deployment decreases from 5 to 3 while the new one contains 2 replica at this moment. If we access the service now, we will find sometimes the old version number is returned and sometimes the new version number is displayed. This is because when rolling update the application, both new version replica and old version replica exist. The incoming traffic will be dispatched to different version replica. Therefore we can observe two different version at the same time.
$ kubectl get deployment -n kubevela-demo-namespace -w
NAME                       READY   UP-TO-DATE   AVAILABLE   AGE
kubevela-demo-app-web-v1   5/5     5            5           11m
kubevela-demo-app-web-v2   0/0     0            0           0s
kubevela-demo-app-web-v2   0/0     0            0           0s
kubevela-demo-app-web-v2   0/0     0            0           0s
kubevela-demo-app-web-v1   5/5     5            5           12m
kubevela-demo-app-web-v2   0/0     0            0           0s
kubevela-demo-app-web-v2   0/0     0            0           0s
kubevela-demo-app-web-v2   0/0     0            0           0s
kubevela-demo-app-web-v2   0/0     0            0           0s
kubevela-demo-app-web-v2   0/2     0            0           0s
kubevela-demo-app-web-v2   0/2     0            0           0s
kubevela-demo-app-web-v2   0/2     0            0           0s
kubevela-demo-app-web-v2   0/2     2            0           0s
kubevela-demo-app-web-v1   5/5     5            5           12m
kubevela-demo-app-web-v2   1/2     2            1           2s
kubevela-demo-app-web-v2   2/2     2            2           2s
kubevela-demo-app-web-v1   5/3     5            5           13m
kubevela-demo-app-web-v1   5/3     5            5           13m
kubevela-demo-app-web-v1   3/3     3            3           13m
$ curl http://kubevela-demo-cicd-app.cf7c0ed25b151437ebe1ef58efc29bca4.us-west-1.alicontainer.com/
Version: 0.1.1
$ curl http://kubevela-demo-cicd-app.cf7c0ed25b151437ebe1ef58efc29bca4.us-west-1.alicontainer.com/
Version: 0.1.1
$ curl http://kubevela-demo-cicd-app.cf7c0ed25b151437ebe1ef58efc29bca4.us-west-1.alicontainer.com/
Version: 0.1.1
$ curl http://kubevela-demo-cicd-app.cf7c0ed25b151437ebe1ef58efc29bca4.us-west-1.alicontainer.com/
Version: 0.1.1
$ curl http://kubevela-demo-cicd-app.cf7c0ed25b151437ebe1ef58efc29bca4.us-west-1.alicontainer.com/
Version: 0.1.2
$ curl http://kubevela-demo-cicd-app.cf7c0ed25b151437ebe1ef58efc29bca4.us-west-1.alicontainer.com/
Version: 0.1.2
$ curl http://kubevela-demo-cicd-app.cf7c0ed25b151437ebe1ef58efc29bca4.us-west-1.alicontainer.com/
Version: 0.1.2
$ curl http://kubevela-demo-cicd-app.cf7c0ed25b151437ebe1ef58efc29bca4.us-west-1.alicontainer.com/
Version: 0.1.2
$ curl http://kubevela-demo-cicd-app.cf7c0ed25b151437ebe1ef58efc29bca4.us-west-1.alicontainer.com/
Version: 0.1.1
After confirming new services are functioning correctly, we can remove the batchPartition: 0 as described above to complete the whole canary release process.
$ kubectl get deployment -n kubevela-demo-namespace -w
NAME                       READY   UP-TO-DATE   AVAILABLE   AGE
kubevela-demo-app-web-v1   3/3     3            3           18m
kubevela-demo-app-web-v2   2/2     2            2           5m24s
kubevela-demo-app-web-v2   2/5     2            2           5m36s
kubevela-demo-app-web-v2   2/5     2            2           5m37s
kubevela-demo-app-web-v2   2/5     2            2           5m37s
kubevela-demo-app-web-v2   2/5     5            2           5m37s
kubevela-demo-app-web-v2   3/5     5            3           5m38s
kubevela-demo-app-web-v2   4/5     5            4           5m38s
kubevela-demo-app-web-v2   5/5     5            5           5m39s
kubevela-demo-app-web-v1   3/0     3            3           18m
kubevela-demo-app-web-v1   3/0     3            3           18m
kubevela-demo-app-web-v1   0/0     0            0           18m
kubevela-demo-app-web-v1   0/0     0            0           18m
kubevela-demo-app-web-v2   5/5     5            5           5m41s
kubevela-demo-app-web-v2   5/5     5            5           5m41s
kubevela-demo-app-web-v1   0/0     0            0           18m
Conclusion
In summary, we executed the whole continuous delivery process successfully. In this process, developers can easily update and deploy their applications, with the help of KubeVela and Jenkins. Besides, developers can use their favourite tools in different stages, such as substituting GitHub with Gitlab, or using TravisCI instead of Jenkins.
Readers might also notice that this progress can not only upgrade the application service, but also change deployment plan via editing app.yaml, such as scaling up or adding sidecars, which works like classical push-style GitOps. About more KubeVela GitOps content, you can refer to other related case studies.