Deploy Container Image
In this section, we will introduce how to deploy a container based application with KubeVela. The guide will run the whole process with UI console as it's quite the same with the quick start if you're using CLI.
Before starting
- Containerize your business, you need a container image within your image registry that can be accessed by KubeVela.
- Enable the VelaUX addon by running command
vela addon enable velaux.
Creating an application
Enter the page of Application on the left, and click New Application to create. Pick your name, alias, and description; Select type of webservice; Decide your environment, Default environment is already available in the first place. You could also enter the page of Environments to set up new.
Click Next Step so to the configuration page. You need to set up the Image address and resources limit. If you want to set up a command for the image, open up the row CMD.
If you want to deploy the private image, please create the registry integration configuration. refer to: Image registry configuration
After inputting the Image address, the system will load the Image info from the registry. If the image belongs to the private image registry, the Secret field will be automatically assigned values.
You could refer to their information to configure the Service Ports and Persistent Storage.
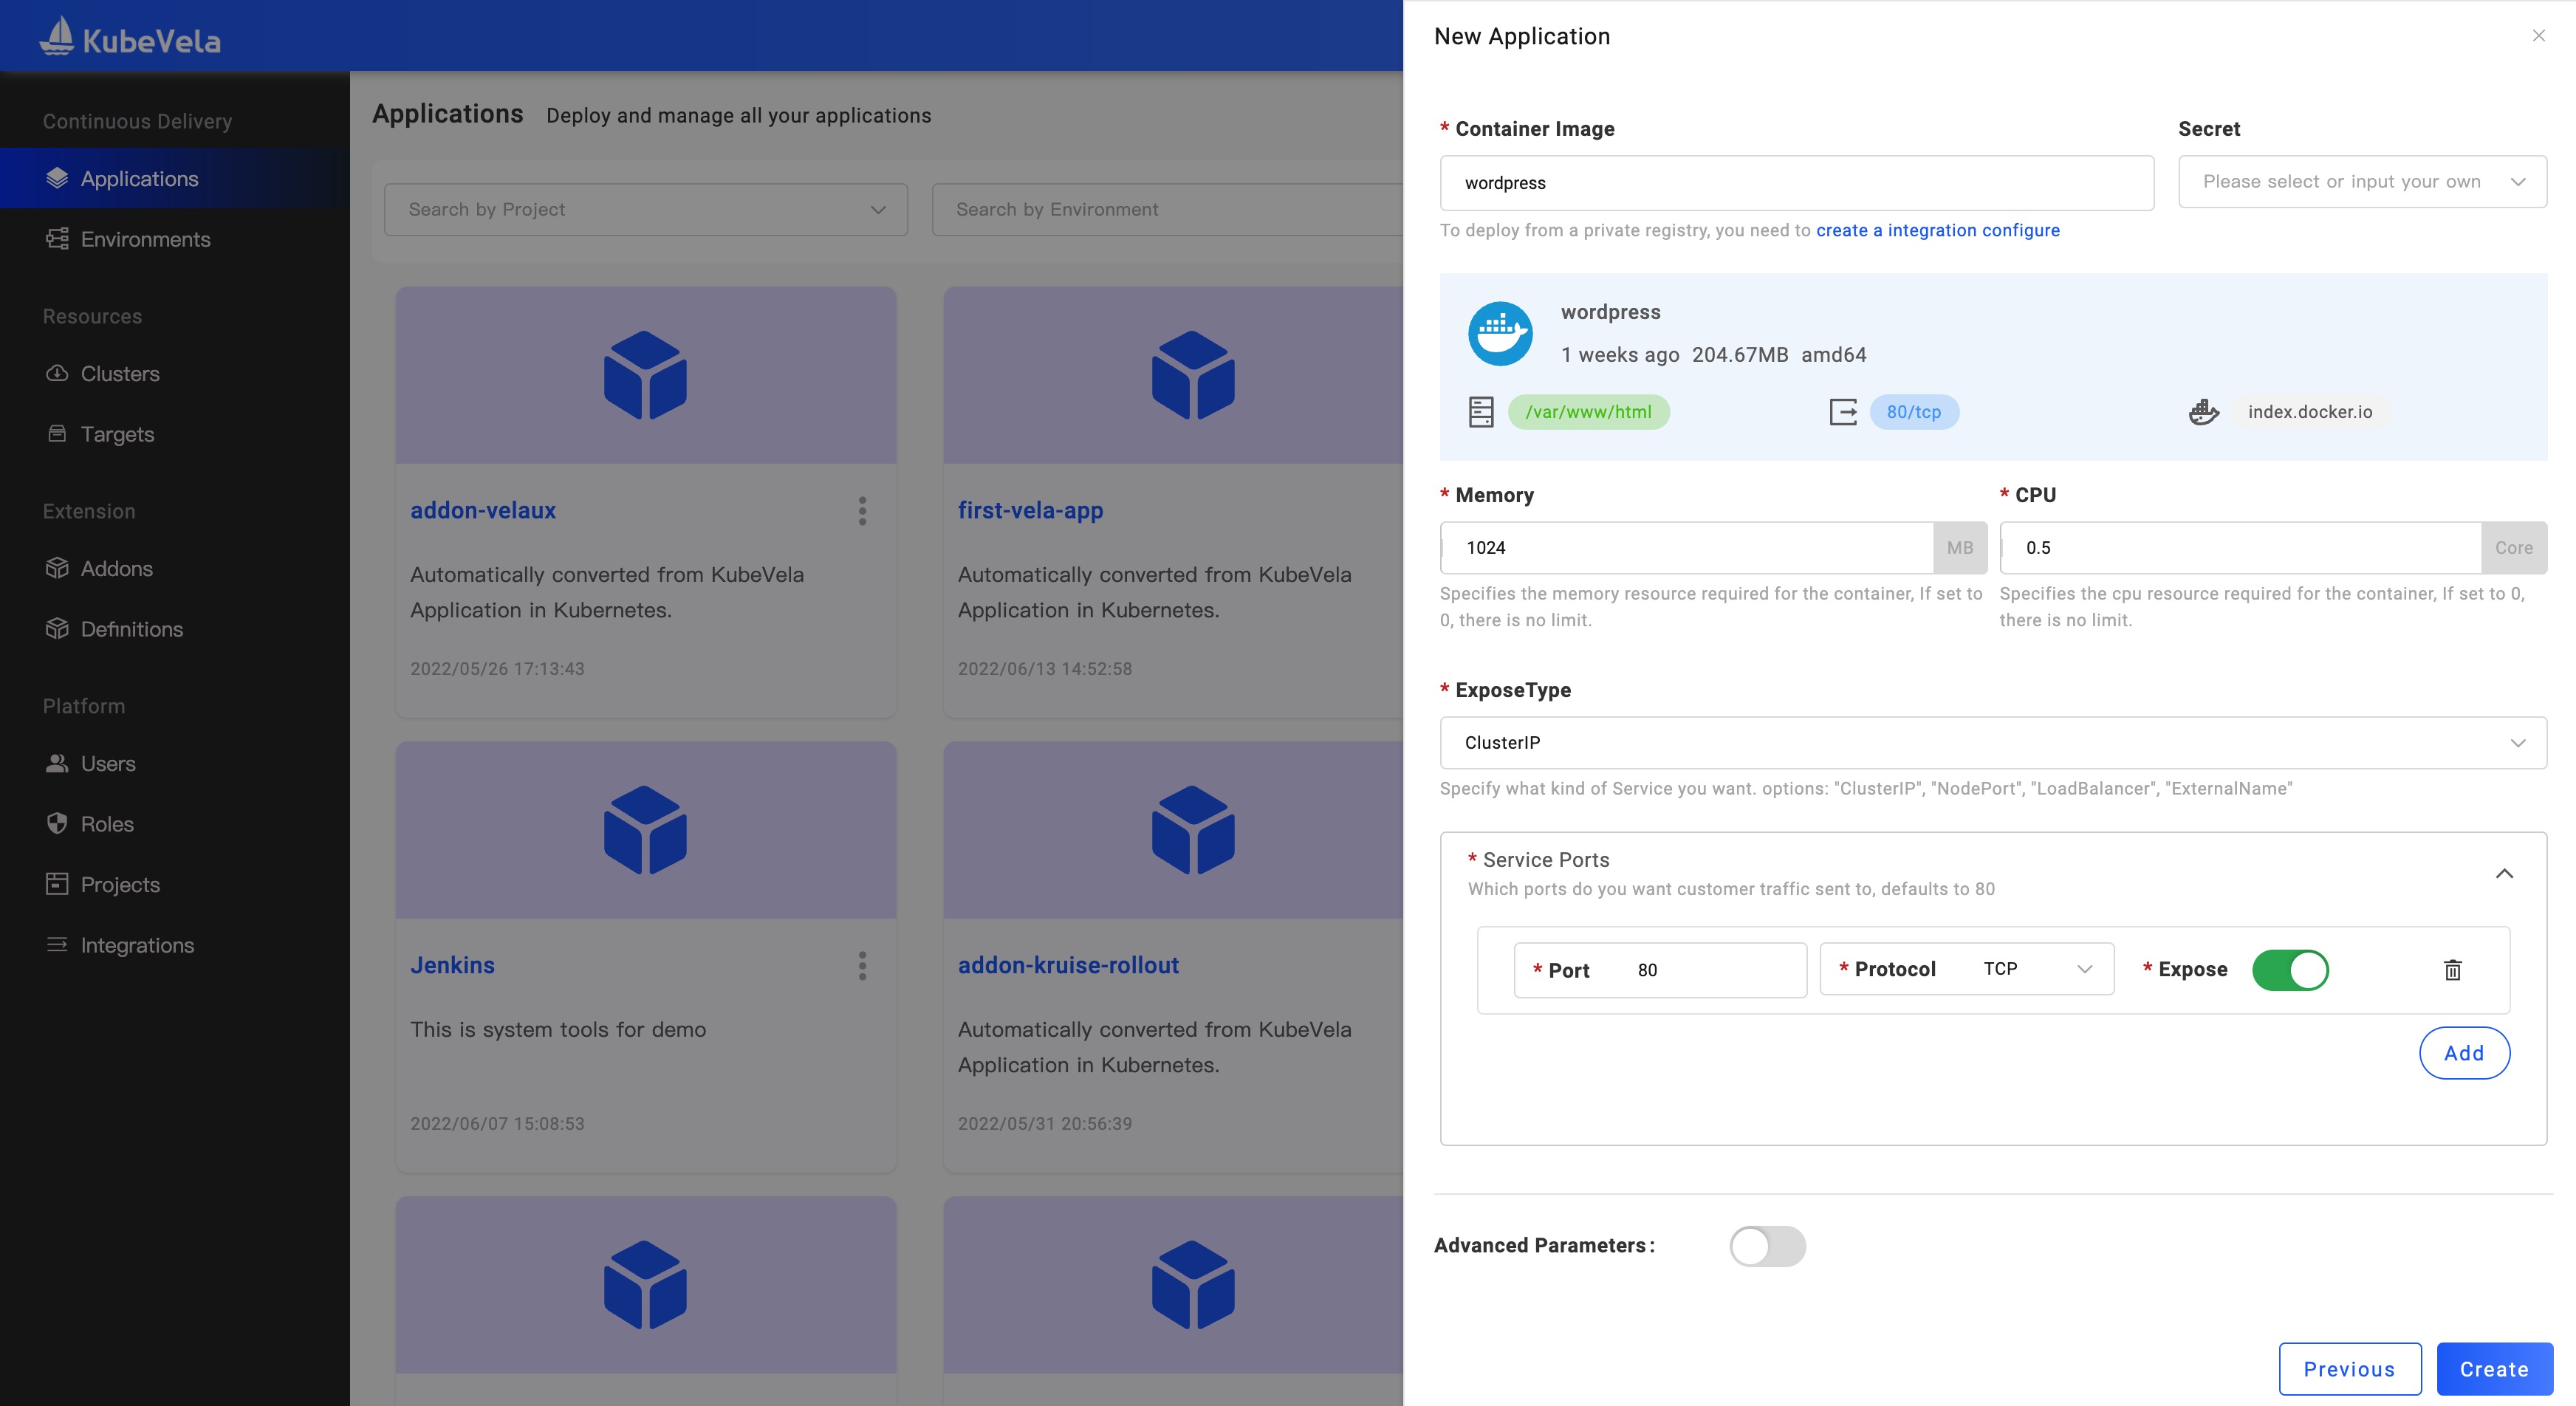
Done by clicking Create and then we enter the management page.
Deploying the application
Click the Deploy button on the upper right and select a workflow. Note that each Environment of the application has its workflow. On the right of the Baseline Config tab is the environments. Check out the status of the environment and its instance information as you wish.
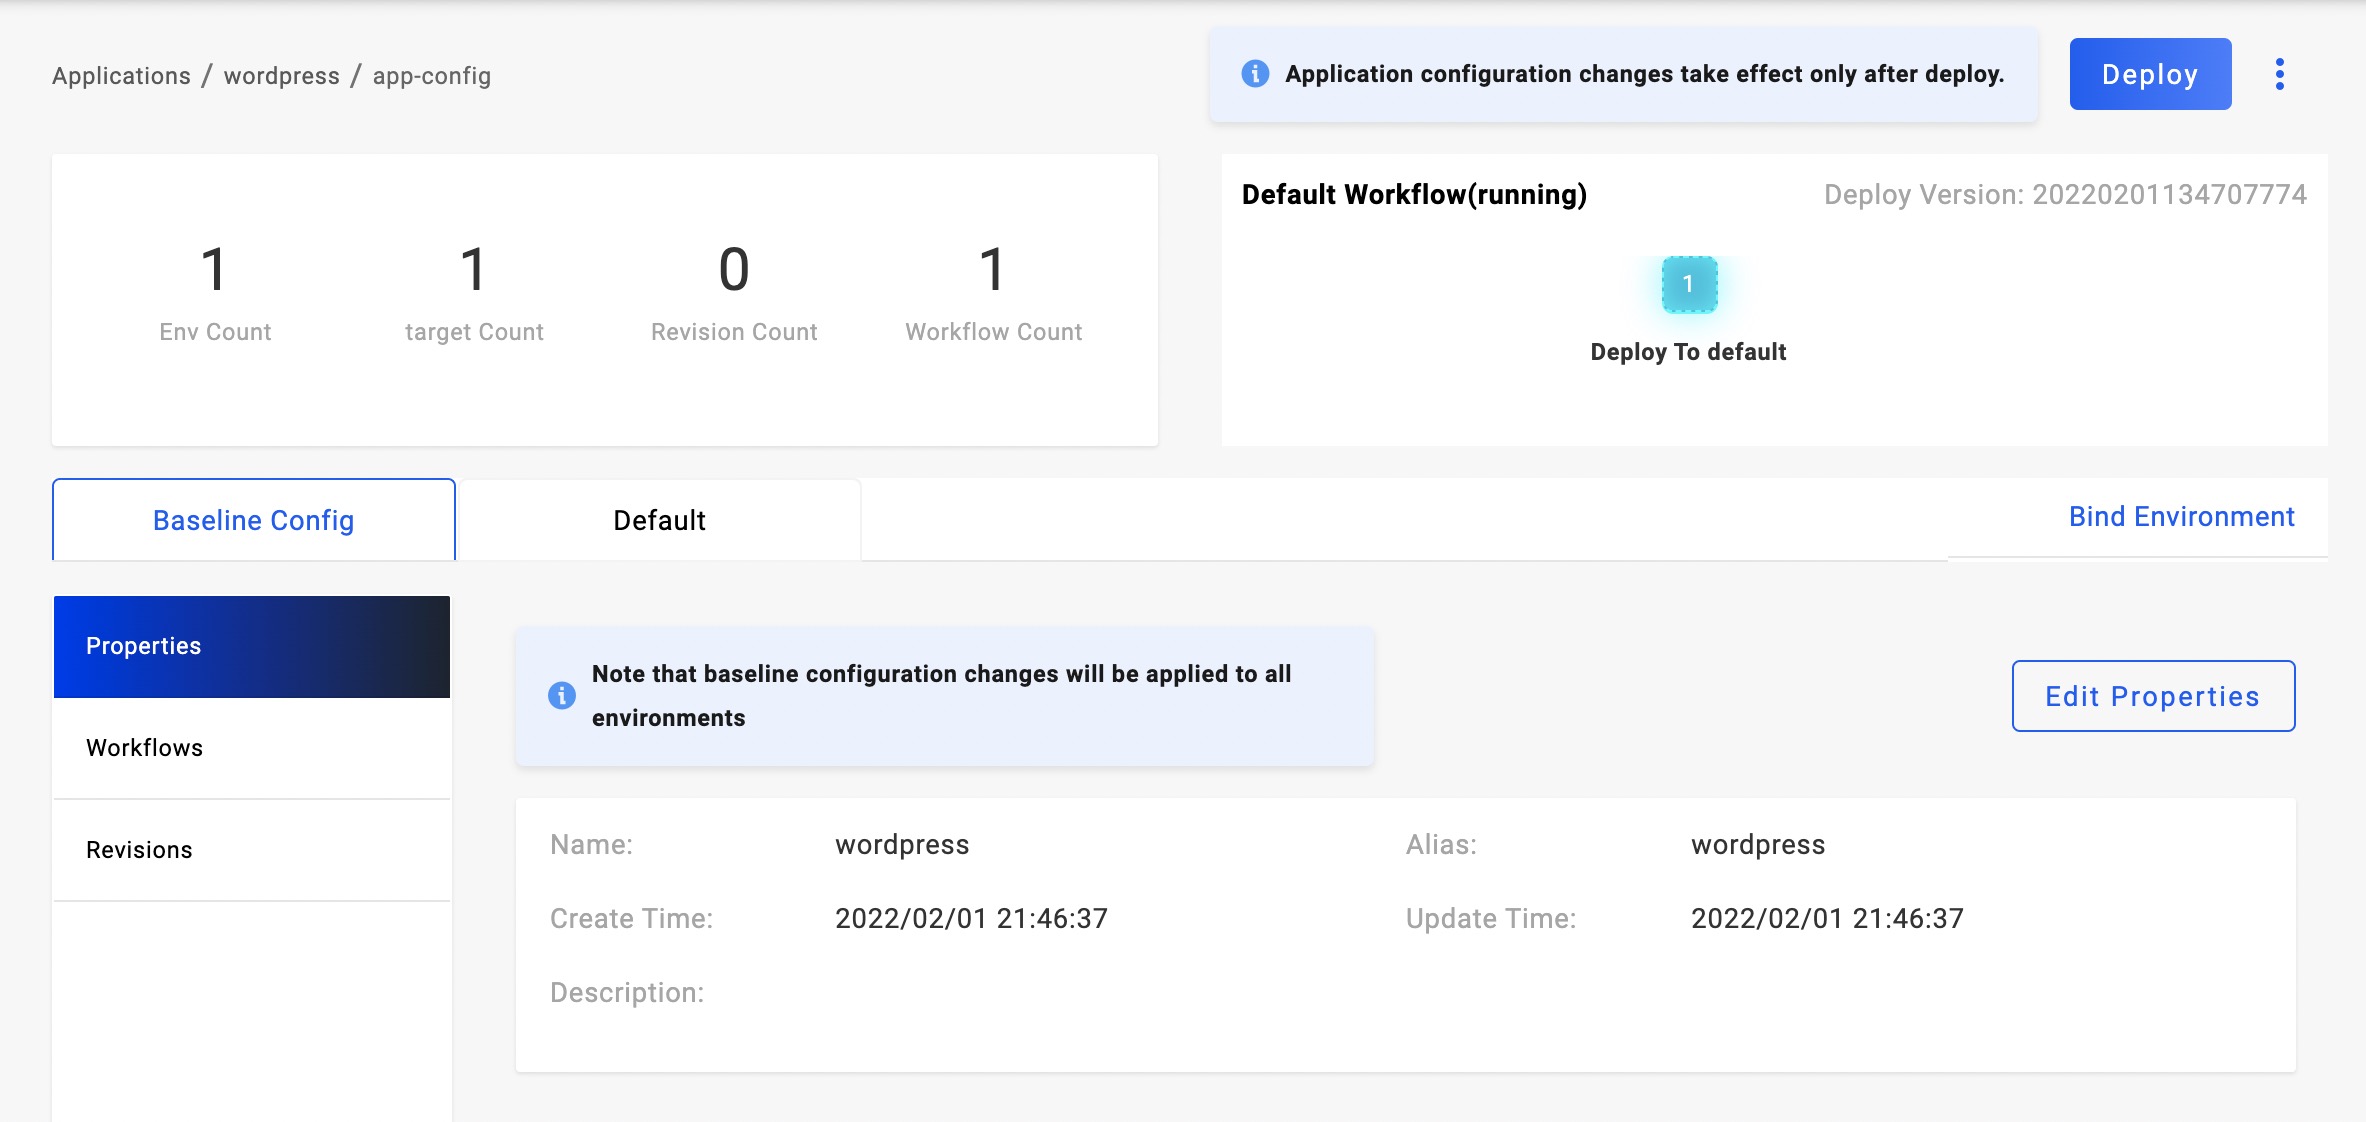
When it has several targets in this environment, you may find them all in the Instances list. If you want to look at the process of application deployment, click Check the details to reveal.
In the Instances list, you may find some of them are in pending status. Click + in the beginning to figure out the reason in more detail.
Update image
After the first deployment, our business keeps evolving and the following updates come along.
Click Baseline Config and you can see the all components. Then click the component name and open the configuration page, you can update your latest requirements for image, version, and environment variable.
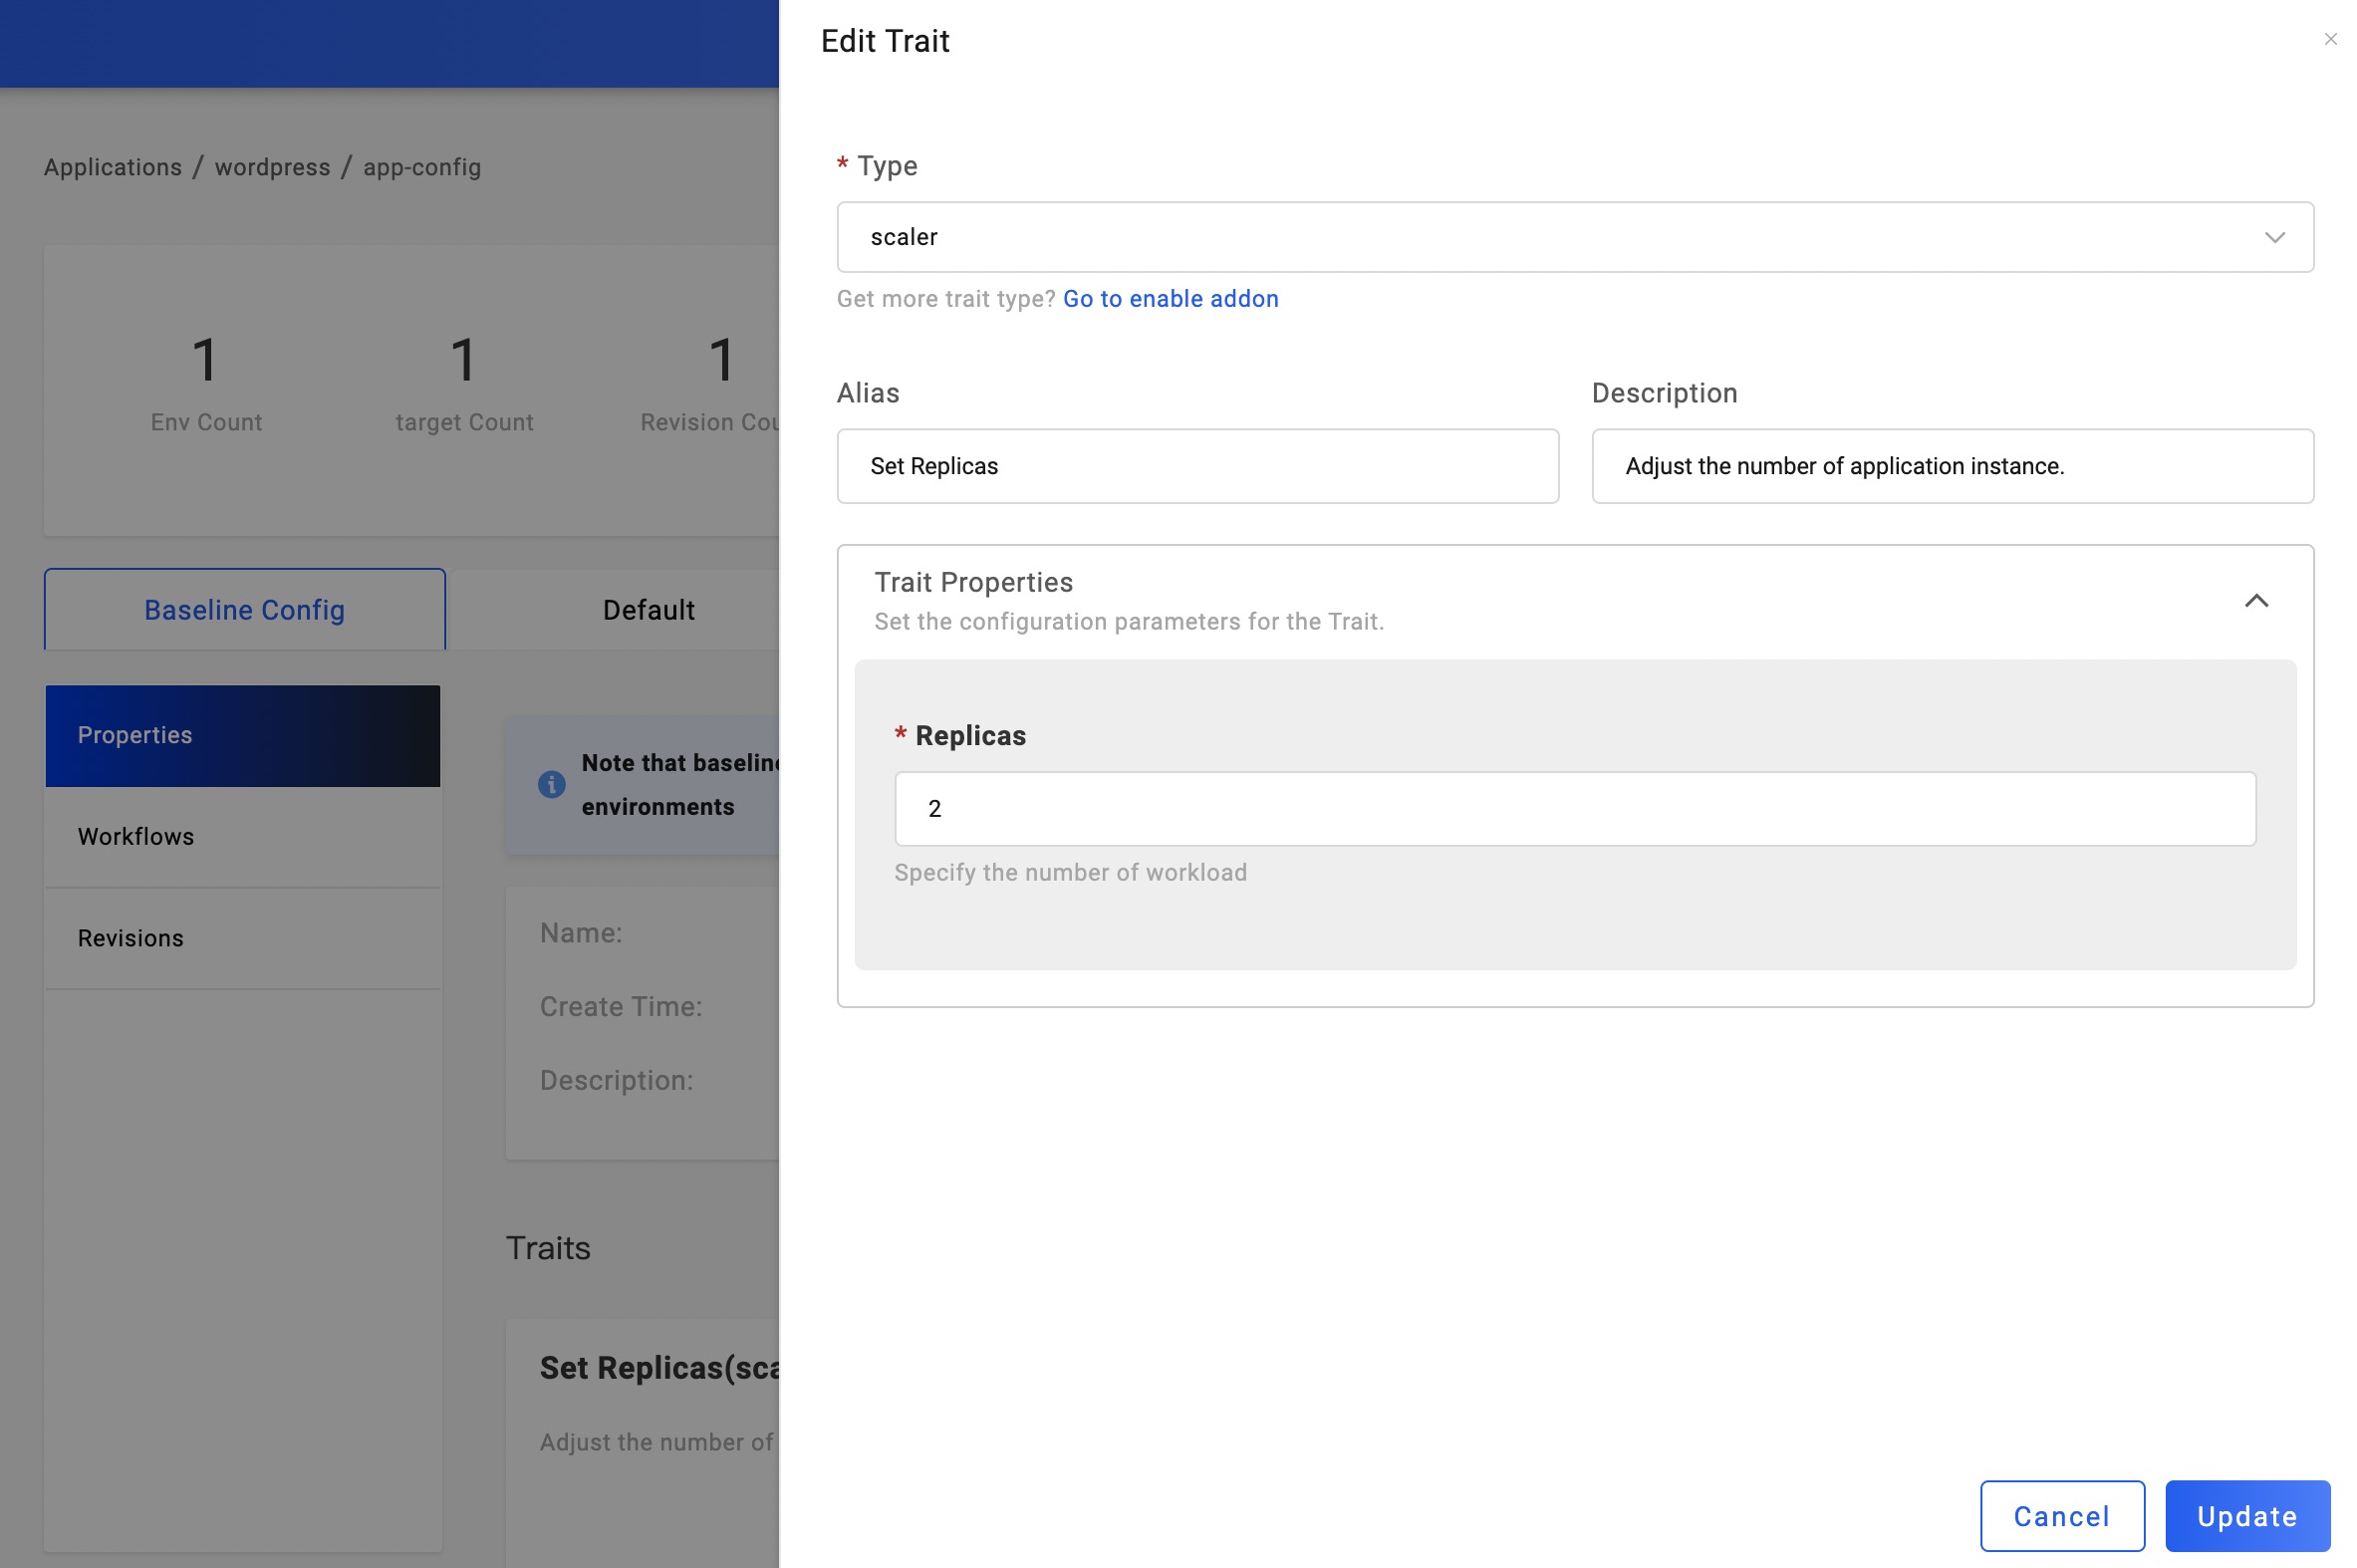
Update replicas
If your business requires more than one replica, enter the Properties page. By default, The component has a Set Replicas trait. Click it so that you can update the replicas.
Upgrading the application
By twos steps as above, it is still in a draft state, we need to click the deployment button again to complete the upgrade of the application.
Application recycling and deletion
If you need to delete the application after testing, you need to recycle all the deployed environments first. Click the environment name to enter the environment instance list, and click the Recycle button to recycle the deployment of the application in that environment. After it's done, the application in this environment rolls back as an undeployed one.
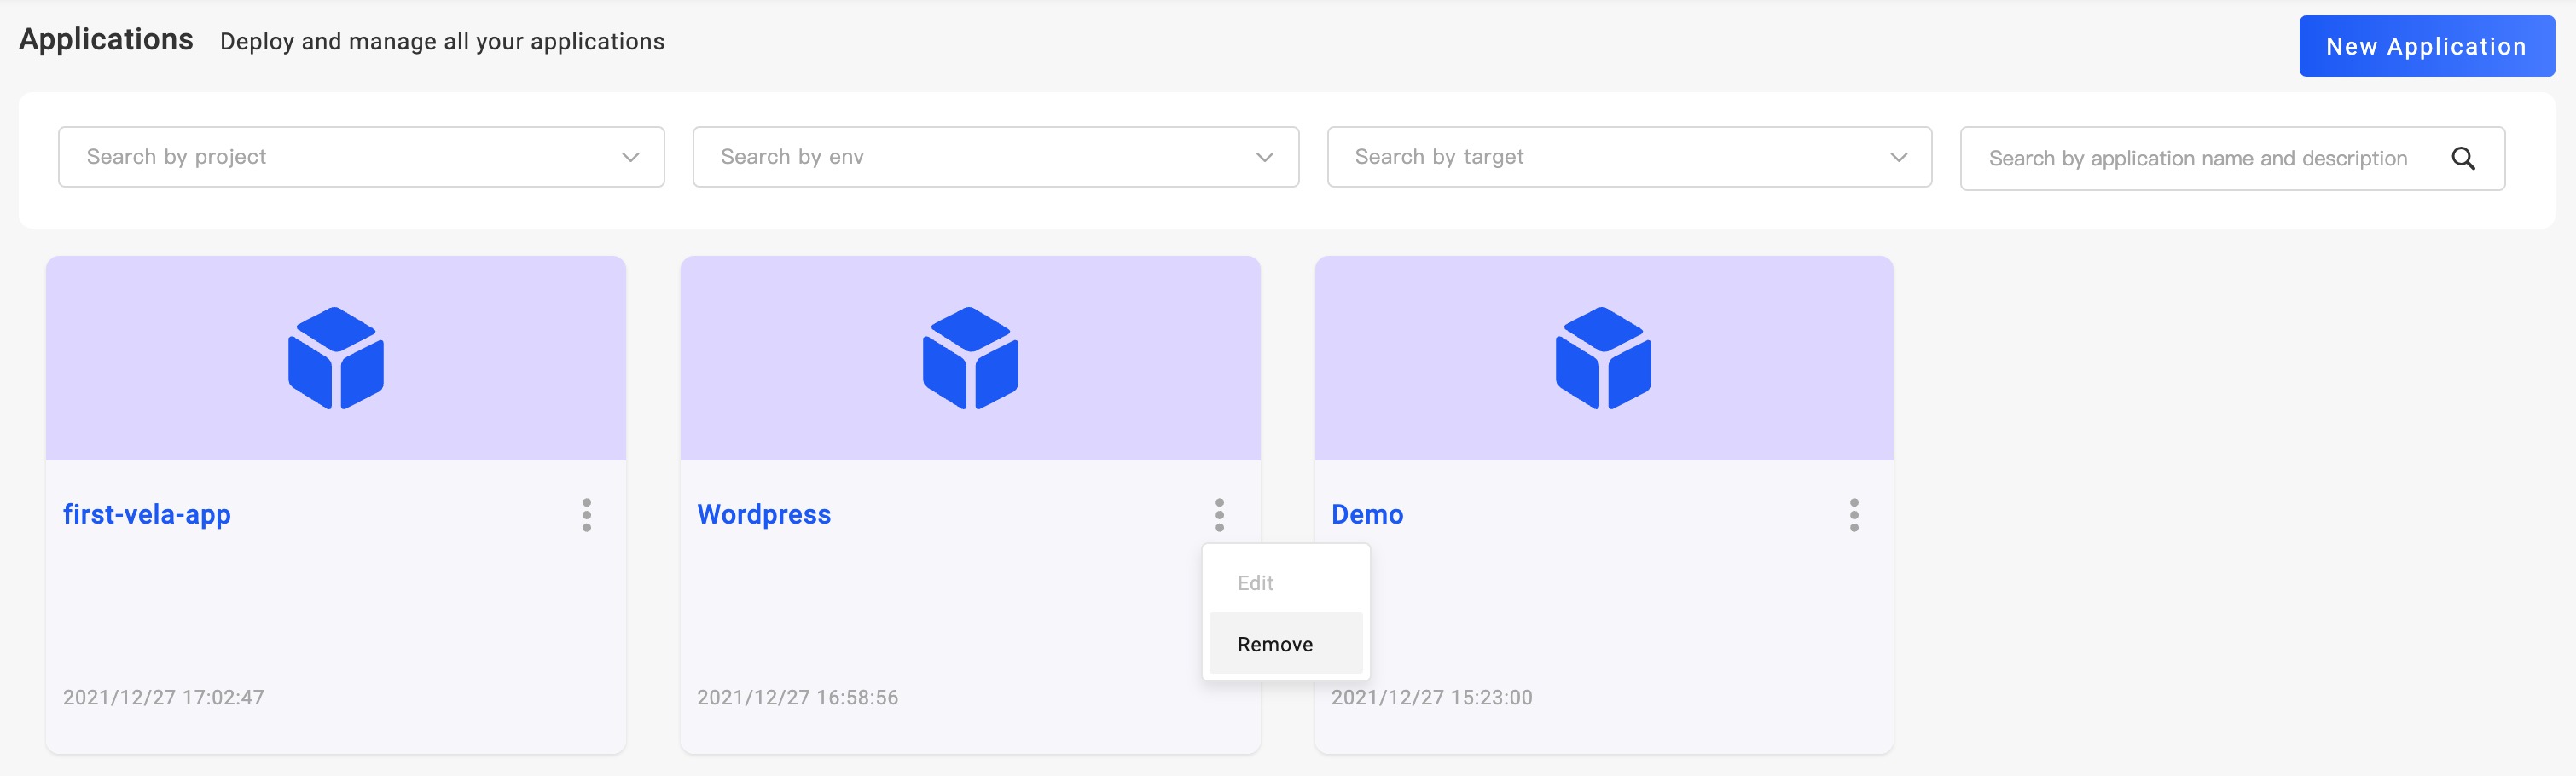
After all of the environments have been recycled, the application can be deleted. Currently, the entry for application deletion is on the application list page. Back to the application list page, mouse on the menu icon on the right side of the application name, and click the Remove option.
At this point, you have basically mastered the deployment method of Docker image.
You can refer to how to manage applications to learn the details about the UI console operations.
Deploy via CLI
You also can deploy the application via CLI.
cat <<EOF | vela up -f -
# YAML begins
apiVersion: core.oam.dev/v1beta1
kind: Application
metadata:
  name: webservice-app
spec:
  components:
    - name: frontend
      type: webservice
      properties:
        image: oamdev/testapp:v1
        cmd: ["node", "server.js"]
        ports:
          - port: 8080
            expose: true
        exposeType: LoadBalancer
        cpu: "0.5"
        memory: "512Mi"
      traits:
        - type: scaler
          properties:
            replicas: 1
# YAML ends
EOF
Currently, The application created by CLI will be synced to UI, but it will be readonly.
You can also save the YAML file as webservice-app.yaml and use the vela up -f webservice-app.yaml command to deploy.
Next, check the deployment status of the application through vela status webservice-app
About:

  Name:         test-app
  Namespace:    default
  Created at:   2022-04-21 12:03:42 +0800 CST
  Status:       running

...snip...

Services:

  - Name: frontend
    Cluster: local  Namespace: default
    Type: webservice
    Healthy Ready:1/1
    Traits:
      ✅ scaler
Now, you have finished learning the basic delivery for container images. Then, you could:
- Refer to webservice details to know usage of full fields.
- Refer to trait reference to know which traits can be used for webservice.
- Refer to multi-cluster delivery to know how to deploy container image into hybrid environment and multi-clusters.